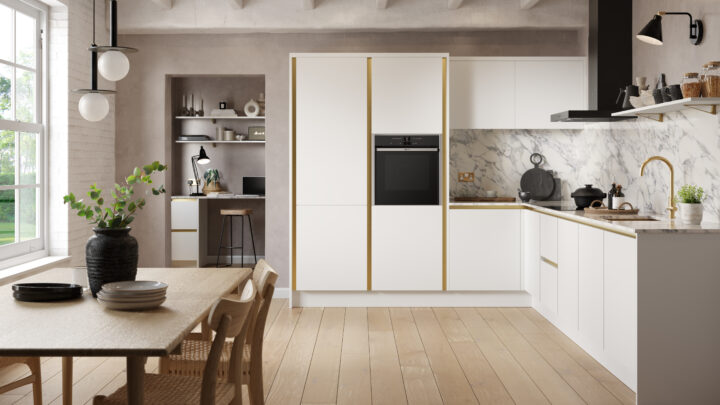
Planning Your Budget-Friendly Door Replacement
Replacing tired cabinet doors is the most cost-effective way to refresh a kitchen without the upheaval of changing your units. By retaining your existing carcasses and swapping the visible elements—doors, drawer fronts, end panels and plinths—you can transform the room in a weekend and for a fraction of the cost of a full refit. Doorfinder makes this approach even more accessible, with high-quality doors at exceptional prices (high gloss from £10.06, handleless from £13.01, matt from £11.65, and shaker from £21.94) plus matching panels, units and accessories. Add the lowest price guarantee, expert advice, and free UK mainland delivery, and you have everything you need to achieve a polished finish on a tight budget.
This guide sets out how to measure accurately, choose styles and components, and fit your doors and panels correctly. It also covers essential tools, hinge-hole positioning for 35 mm cup hinges, drilling techniques, and common mistakes to avoid—followed by a practical checklist and money-saving tips tailored for DIYers.
Measuring Accurately: The Foundation of a Flawless Fit
The time you invest in careful measurement is the biggest factor in a trouble-free install. Work methodically, note everything, and label each cabinet.
Tools you will need
- Tape measure (in millimetres), steel rule and a sharp pencil
- Combination square and spirit level
- Notepad or spreadsheet
- Masking tape for temporary labels
- Optional: camera phone for quick cabinet-by-cabinet photos
Measure existing doors
- Width and height: Remove one door per run and measure it edge to edge in millimetres. Note that many UK carcasses are 18 mm thick and doors commonly range from 395 mm to 715 mm high (wall units) and 715 mm to 895 mm high (base units), but do not assume—measure your door sizes directly.
- Hinge side: Record whether each door is left- or right-hinged (i.e., which side the hinges sit on when facing the cabinet).
- Gaps (reveals): Measure the gap between neighbouring doors and between doors and panels. A consistent 2–3 mm gap looks professional and avoids binding.
- Hinge-hole positions: If you intend to replicate existing hinge-hole positions, measure from the top edge of the door to the centre of the top hinge cup, and from the bottom edge to the centre of the bottom hinge cup. Record to the nearest millimetre. Photograph hinge locations on each door for reference.
- Handle hole centres: If you are reusing handles, measure the distance between the centres of the two holes (e.g., 96 mm, 128 mm, 160 mm). If you will fit new handles, you can choose your preferred size later and drill fresh holes.
Measure carcass openings (for reference)
- Opening size: Note the internal opening width and height of a couple of representative cabinets. This helps you check door overlays and confirm you will maintain consistent gaps.
- Hinge mounting plates: Confirm their positions on the carcass and whether they are in good condition. Reusing existing plates can save time, provided they suit your new hinges.
Measure end panels and fillers
- End panels typically run from the floor to the underside of the worktop. Measure floor-to-worktop height at the panel location and again 500 mm along the run; floors are rarely perfectly level, so expect variation.
- Measure the required depth. It often matches the carcass depth plus any overhang you want to conceal.
- For fillers (narrow scribe panels used to infill gaps at walls), measure the tight gap at several points and plan to scribe for a seamless finish.
Measure plinths (kickboards)
- Measure from the floor to the underside of the carcass at several points along each run; adjustable legs and uneven floors mean plinth height can vary. Standard plinths are often set around 150 mm, but rely on your measurements.
- Record the total lengths of each run and note external corners and returns.
Choosing Styles, Components and Hardware
Door style and finish
- High gloss (from £10.06): Reflective and modern, great for amplifying light in compact kitchens. Wipe-clean, but shows fingerprints more readily—consider contrasting matt end panels to balance.
- Handleless (from £13.01): Sleek and contemporary. Choose J-pull profiles for integrated grip or push-to-open hardware for a completely smooth face. Works especially well in streamlined schemes.
- Matt (from £11.65): Understated, refined and forgiving of fingerprints and daily wear. An excellent choice for busy households.
- Shaker (from £21.94): A timeless frame-and-panel design that suits classic or modern rustic interiors. Easy to combine with traditional handles or modern bar pulls.
Panels, plinths and trims
- Specify matching end panels and plinths to complete the look. Consider adding cornice and pelmet trims to wall units for a fully tailored finish.
- Order panels slightly oversize where walls are uneven; you can scribe them for a tight, shadow-free fit.
Hinges and opening type
- Most modern UK kitchens use concealed 35 mm cup hinges. Choose:
- Overlay type: full overlay (door fully covers the carcass edge), half overlay (two doors share a partition), or inset (door sits within the opening). Match what you currently have to avoid moving plates.
- Opening angle: 110° is common; wider angles (e.g., 155°) suit corner or pull-out areas.
- Soft-close: Adds refinement and protects finishes; can be built-in or added as a separate damper.
- Left/right swing: Decide which way each door should open. Most concealed hinges are reversible; “left” or “right” simply depends on which side you mount them.
Handles and knobs
- Bar, bow, knob or integrated grip—choose hardware that complements your door style. Check hole centres (e.g., 96, 128, 160 mm) and consider ergonomics on tall doors and heavy drawers.
Accessories and storage
- Upgrade functionality with pull-outs, corner solutions, and waste sorters. Small additions often yield a big day-to-day improvement.
Budget pointers
- Leverage Doorfinder’s lowest price guarantee and free UK mainland delivery to keep costs down.
- Standard sizes are the best value; redesign your layout only if necessary.
- Reuse good hinges and mounting plates where compatible. Swap only worn parts or add soft-close dampers.
- Keep handle choices consistent to reduce drilling and speed up fitting.
Fitting Doors, Panels and Plinths: Tools, Setup and Technique
Essential tools
- Cordless drill/driver, screwdriver set and a 35 mm Forstner bit for hinge cups
- 2 mm and 3 mm pilot bits and a bradawl
- Carpenter’s square, level, clamps and a workbench
- Masking tape, sharp pencil and measuring gauge or hinge jig (optional)
- Fine-tooth saw or track saw for panels and plinths; edge-banding iron if edging raw cuts
Hinge-hole positioning for 35 mm cup hinges
- Cup diameter: 35 mm
- Drilling depth: Typically 12–13 mm. Leave 2–3 mm of material between the bottom of the hole and the face of the door. Check your hinge specification.
- Cup setback (K dimension): The distance from the door edge to the edge of the 35 mm hole. Commonly 3–5 mm. This places the hole centre roughly 21.5–22.5 mm from the door edge for many standard hinges.
- Vertical positions: Mark the cup centre around 100 mm from the top edge and 100 mm from the bottom edge of the door. For doors above 900 mm high, add a third hinge centred between the two. For very tall or heavy doors, a fourth hinge may be appropriate.
Drilling tips for clean, accurate results
- Mark clearly: Use a square to draw a light reference line parallel to the door edge at your chosen centre setback, then mark your cup centres along it.
- Prevent breakout: Place masking tape over the drilling area and back up the door with scrap material. Drill slowly until the cutter’s rim scores a clean circle before advancing to full depth.
- Test on an offcut: If you have a spare or damaged door, verify depth and fit before you commit to every door.
- Pilot first for screws: After fitting the hinge cups, use a 2 mm bit for pilot holes for hinge screws and mounting plates to avoid splitting.
Fitting sequence
1) Fit hinges to doors
- Insert the hinge cup in each 35 mm hole, align square to the door edge and fix with the supplied screws. Ensure both hinges share the same setback and alignment.
2) Attach or reuse mounting plates on carcasses
- If reusing existing plates, leave them in position and simply clip the new hinges on. If replacing, position plates in the same locations as before to maintain alignment. Use a level and the cabinet’s shelf pin holes as a datum if needed.
3) Hang and align the doors
- Clip each door onto its plates. Use the hinge’s three-way adjustment screws to fine-tune:
- Side-to-side to set consistent 2–3 mm gaps
- In/out to bring the door face flush with neighbouring doors and panels
- Up/down to align top and bottom edges across a run
- Work from one end of the run to the other, revisiting earlier doors after adjustments.
4) Fit handles or knobs
- Confirm hole centres. Use a handle jig or make a simple template from cardboard or thin timber so every handle sits at the same height and distance from the edge.
- Mark with a bradawl, drill a small pilot from the face, then finish from the rear to prevent breakout. Deburr holes before fitting screws.
5) Install end panels and fillers
- Cut panels slightly oversize, offer up, and scribe to the wall or floor using a scribing tool or compass. Trim with a fine-tooth blade for a tight fit.
- Fix from inside the carcass with screws, or use grab adhesive plus discreet mechanical fixings. Seal exposed edges near sinks and dishwashers with clear silicone for moisture protection.
- Edge-band any cut sides that may be visible.
6) Fit plinths
- Mark exact height from the highest point of the floor to the underside of the cabinets. Cut plinths to this height so they sit level across the run.
- Use plinth clips on cabinet legs for easy removal later. Mitre external corners and add end returns for a finished look.
Common Mistakes to Avoid, Plus a Practical Checklist
Frequent pitfalls
- Guessing sizes: Ordering “standard” doors without measuring existing ones leads to misfits and uneven gaps.
- Ignoring hinge type: Mixing overlay types (full, half, inset) or choosing the wrong mounting plates can throw off alignment.
- Incorrect cup drilling: Drilling the 35 mm cup too deep or with the wrong setback prevents hinges from seating and adjusting properly.
- Forgetting door swing: Reversing the hinge side on asymmetric layouts can block appliances or walls.
- Misaligned handles: Drilling without a jig leads to inconsistent heights and skewed lines—especially noticeable on banks of drawers.
- Skipping scribing: Forcing square-cut panels against out-of-true walls leaves unsightly gaps.
- No edge sealing: Unsealed cut edges near moisture sources can swell over time.
- Neglecting levelling: Fitting doors before confirming base units and worktops are level makes alignment much harder.
Your simple checklist
-
Plan:
- Decide your style (high gloss, handleless, matt or shaker) and colour scheme.
- Confirm door opening type (overlay/inset) and hinge preferences (soft-close, angle).
- List every cabinet with door size, hinge side and number of hinges.
-
Measure:
- Measure each existing door’s width and height in mm.
- Record hinge cup positions from top/bottom and cup setback if replicating.
- Note handle hole centres if reusing hardware.
- Measure end panels, fillers and plinth runs with allowance for scribing.
-
Order:
- Choose matching end panels and plinths.
- Add hinges, mounting plates, handles, and any storage upgrades.
- Use Doorfinder’s lowest price guarantee and free UK mainland delivery to maximise value.
- If uncertain on any measurement, seek Doorfinder’s expert advice before placing the full order.
-
Prepare:
- Gather tools: 35 mm Forstner bit, pilot bits, drill/driver, square, level, clamps, jig/template.
- Clear a protected workspace and label each replacement to match its cabinet.
-
Fit:
- Drill hinge cups (35 mm diameter; 12–13 mm deep; 3–5 mm setback).
- Mount hinges and plates; hang doors; adjust to even 2–3 mm gaps.
- Fit handles with a template; install end panels and plinths; seal cut edges near moisture.
Saving more on your refresh
- Work with what you have: Keeping the existing layout, carcasses and even hinge plates (if compatible) speeds up the job and slashes spend.
- Choose value-led finishes: Matt and handleless lines can deliver designer looks at accessible price points; high gloss can modernise a kitchen with the smallest outlay.
- Bundle your order: Doors, panels, hinges and handles ordered together arrive ready for a single install—free UK mainland delivery keeps costs predictable.
- Ask the experts: Doorfinder’s team can help confirm sizes, hinge choices and quantities so you avoid costly reorders.
By combining precise measurement, thoughtful product choices and careful fitting technique, you will achieve a factory-level finish for a DIY budget. With the breadth of styles—from high gloss to shaker—and the pricing and service advantages available through Doorfinder, your kitchen refresh can be fast, efficient and remarkably affordable.