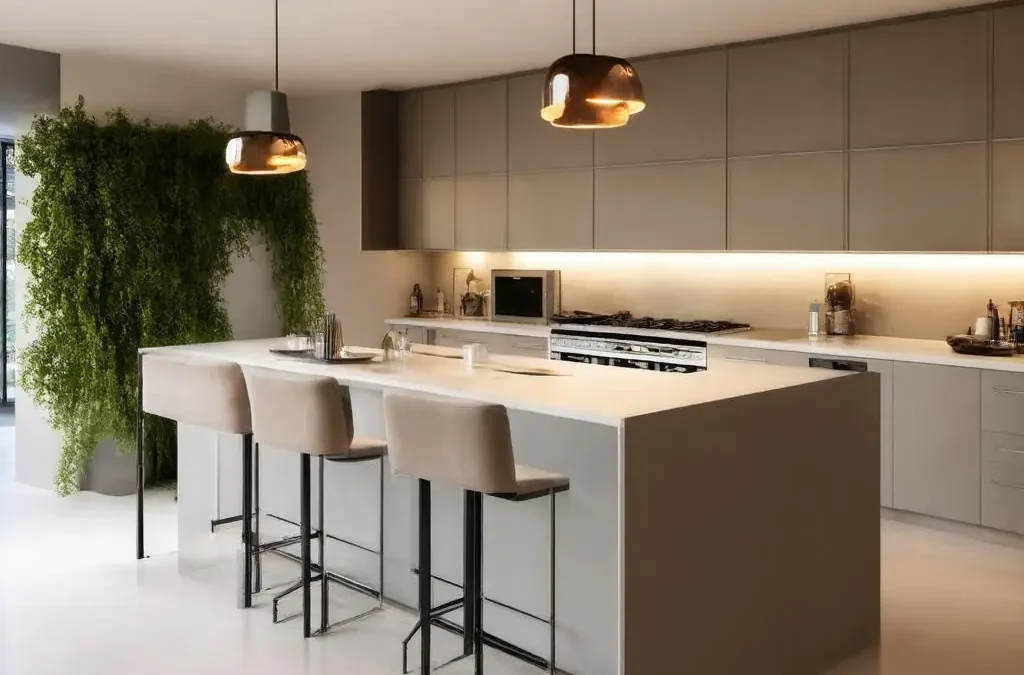
A sociable kitchen invites conversation without compromising the cook’s workflow. The most effective layouts establish a clear cooking zone and a guest zone. An island or peninsula makes this effortless: it turns prep towards the room, offers a natural serving edge for guests, and keeps through‑routes tidy so people can perch with a drink without blocking drawers, ovens or the fridge.
Open‑plan spaces make zoning straightforward, yet even compact kitchens can feel convivial with judicious choices:
- Slimline islands and peninsulas: choose reduced‑depth base units or a narrow worktop to slip an island into tighter footprints.
- Breakfast bars: mount a cantilevered worktop to a run of units or a short return to create instant seating.
- Compact freestanding units: a butcher’s block, console or small table adds surface area and signals where guests can gather.
As a rule of thumb, aim for 90–120 cm of clear circulation around islands and peninsulas. This keeps doors opening freely and allows two people to pass comfortably. Position prep surfaces so you face into the room, not the wall, and conversation will flow naturally while you cook.
Three Quick Wins You Can DIY This Weekend
1) Add freestanding furniture to extend prep and serving
- Butcher’s block or trolley: provides movable surface area, knife‑friendly chopping, and extra drawers. Wheel it beside the hob for prep, then park it by the seating edge for serving.
- Console table: tucks neatly behind a sofa in open‑plan rooms, acting as a buffet counter during gatherings.
- Compact island: join two reduced‑depth base units back‑to‑back and finish with a durable top; or choose a single run of full‑depth units with an overhang for stools.
- Small table: doubles as a breakfast perch and extra mise‑en‑place area.
Subtle zoning is key. A freestanding piece visually signals “guest side” versus “cook side”, reducing under‑foot moments around the hob and sink.
2) Re‑think seating and clear the circulation
- Walkways: preserve 90–120 cm around your island or peninsula so doors and dishwashers open fully and people can pass without sidestepping.
- Overhangs for comfort: allow 25–30 cm of counter overhang for stools so knees tuck in properly.
- Stool spacing: budget about 60 cm centre‑to‑centre for backless stools, 65–75 cm for stools with backs or arms. Leave at least 15 cm clearance at each end of the run.
- Seat height: pair standard counter heights (around 90 cm) with stool seats at 65 cm; for bar‑height counters (around 105 cm), choose 75 cm stools.
Arrange stools so guests face the prep side, not the wall. If space is tight, place two stools on the long edge rather than one at each end to keep traffic lanes clear.
3) Layer lighting and ambience to encourage lingering
- Task and accent lighting: hang pendants 60–80 cm above the worktop for glare‑free task light and an intimate pool over stools. Supplement with under‑cabinet strips for shadow‑free chopping.
- Dimmers on all circuits: shift from bright prep to a softer, conversational glow at the turn of a dial.
- Table and plug‑in lamps: a small lamp on a sideboard or console adds warmth and depth, especially in open‑plan rooms.
- Calming scent: a discreet diffuser or a simmer pot of citrus and herbs signals welcome without overpowering food aromas.
For balanced pendant layouts, divide the island into equal sections and centre each pendant within a “third” or space pendants roughly 60–75 cm apart, ensuring they clear cabinet doors when opened.
Affordable Finishes That Transform the Mood
You can achieve a sociable, polished look without a full refit by updating the elements you see and touch every day.
-
Refresh door fronts to set the tone:
- High gloss doors (from £10.06 at Doorfinder) bounce light around compact rooms, amplifying brightness and the feeling of space.
- Matt doors (from £11.65) deliver a calm, contemporary finish with low glare—ideal under strong task lighting.
- Handleless doors (from £13.01) streamline sightlines and make small kitchens feel sleeker and less visually busy.
- Shaker doors (from £21.94) bring a warm, welcoming character that suits sociable, family‑centred layouts.
-
Coordinate with matching end panels:
Add matching end panels to islands, peninsulas and freestanding units to integrate them with your cabinetry. This simple detail elevates budget pieces and makes add‑ons feel built‑in. -
Upgrade the hardware you use most:
New handles and hinges instantly sharpen the look and feel. Soft‑close hinges make conversation more pleasant, and tactile handles give guests a sense of quality where it counts. -
Keep surfaces clear with clever storage:
Fit pull‑outs, internal drawers and corner solutions so prep zones stay uncluttered. The clearer the counter, the more naturally people gather around it.
Doorfinder offers all of the above—doors, end panels, kitchen units, handles, hinges and storage inserts—at exceptionally competitive prices, with a lowest price guarantee, expert advice and free delivery across the UK mainland. If you are working to a budget or timeline, swapping door fronts and hardware while adding a couple of coordinated panels can deliver a “new kitchen” effect for a fraction of a full remodel.
How to Build a Budget Peninsula from Standard Units
A peninsula is often the simplest way to add seating, serving space and social flow to an existing layout—especially if you lack room for a full island. Here is a straightforward approach that most competent DIYers can achieve.
Materials
- 2–3 standard base units (matching your existing depth and height)
- Plinths and a continuous worktop long enough to create a 25–30 cm overhang on the seating side
- End panels to clad the exposed sides
- Support brackets or decorative legs (for longer overhangs)
- Fixings, adhesive, screws, and basic tools
- Handles, soft‑close hinges and any internal storage inserts you wish to add
Steps
1) Plan the footprint
- Identify the best position to maintain 90–120 cm clear walkways around all sides that will be used as circulation.
- Confirm appliance and door swings will not clash with stools or knees.
- Decide the seating run length and calculate stool count using 60–75 cm per stool.
2) Assemble and fix the base units
- Build the units per the manufacturer’s guidance.
- Align and clamp them together, checking for level and square.
- Fix the run to the floor and, if applicable, to an adjacent wall using appropriate brackets for stability.
3) Add services if needed
- If you intend to include electrics (for a pop‑up socket, for example), plan cable routes now. Use a qualified electrician for any fixed wiring and to comply with UK regulations.
4) Fit the worktop with overhang
- Dry‑fit the worktop to confirm overhangs: 25–30 cm on the seating side; minimal on the working side.
- For overhangs greater than about 25 cm or spans over 90 cm, support with steel brackets or decorative legs fixed into studs or the unit carcass.
5) Finish the look
- Fit matching end panels to all exposed sides for a seamless, built‑in appearance.
- Install plinths, handles and soft‑close hinges.
- Add protective edging and sealant as needed.
6) Position stools and lighting
- Space stools 60 cm centre‑to‑centre for backless designs, 65–75 cm for stools with backs/arms.
- Set pendant bottoms 60–80 cm above the worktop; for two pendants, centre each at one‑third and two‑thirds along the length; for three, split into equal thirds.
- Put pendants and under‑cabinet lights on dimmers to shift from prep to dining mode.
This simple peninsula often delivers the biggest social payoff: guests sit comfortably within conversation range while you maintain a clear, efficient working triangle.
Bringing It All Together
A host‑friendly kitchen does not demand demolition. Start by creating natural zones with an island or peninsula—however compact—then fine‑tune seating and circulation, layer lighting for mood, and refresh the visible finishes. Replace door fronts to strike your preferred tone, add matching end panels to blend new pieces, and upgrade handles, hinges and storage so surfaces stay welcomingly clear.
Doorfinder’s around‑the‑clock online service, London‑based support, lowest price guarantee and free UK mainland delivery make these upgrades straightforward and budget‑friendly for DIY enthusiasts. Whether you opt for high gloss to maximise light, matt or handleless for a sleek modern profile, or shaker for a warm, social feel, you can transform how your kitchen functions for hosting—without a full refit and without overspending.