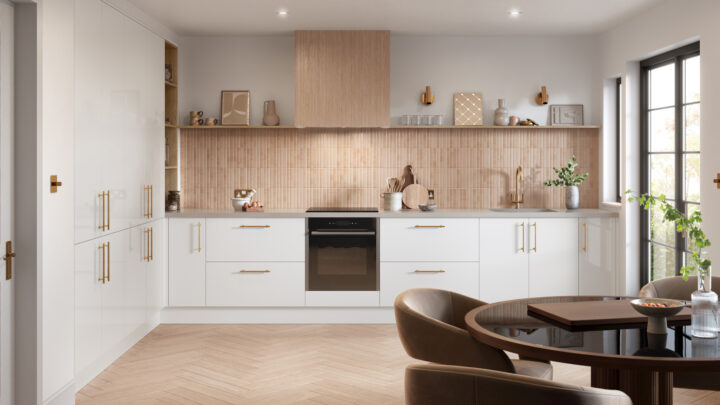
A full kitchen refit that replaces cabinets, worktops, plumbing and electrics typically starts around £8,000 and can easily exceed £15,000 once labour, disposal, and premium finishes are included. By contrast, many households are cutting renovation bills to a fraction of that by reusing sound cabinet carcasses and focusing spend where it shows: doors, end panels, plinths, and handles. With free online video tutorials to guide each stage, a door-and-panel refresh commonly ranges from £300 to £2,000 depending on kitchen size, style and hardware choices—often delivering a showroom-worthy result without a full rip‑out.
To illustrate, consider Doorfinder’s popular options:
- Replacement Kitchen High gloss doors from £10.06 each for a bright, reflective finish.
- Replacement Kitchen Handleless doors from £13.01 for a sleek, contemporary look.
- Replacement Kitchen Matt doors from £11.65 for a refined, low-sheen style that hides fingerprints well.
- Replacement Kitchen Shaker doors from £21.94 for timeless, characterful appeal.
Add matching end panels, plinths and a fresh set of handles, and the visual impact is transformative. Because you are not paying for new units, tiling, appliances or extensive labour, the savings quickly stack up. Doorfinder supports DIYers with a lowest price guarantee, expert advice, and free delivery across the UK mainland—plus a 24/7 online service from its London head office to help you plan and order with confidence.
Step-by-step plan for a weekend kitchen refresh
With careful planning and basic tools, most competent DIYers can complete a door-and-panel upgrade in a weekend. Use freely available video tutorials to visualise each stage, then follow this structured plan.
1) Audit the carcasses
- Inspect every unit for structural soundness, water damage and squareness.
- Check hinges and mounting plates; note any loose fixings or stripped screw holes.
- Confirm worktops and splashbacks are secure; if you have stone surfaces, avoid disturbing them.
2) Measure every opening
- Record width × height for each door and drawer front; label by location.
- Note hinge side (left/right) and number of hinges per door.
- Measure plinth height, end panel dimensions, and any filler gaps.
3) Decide on style and finish
- Shortlist door styles (high gloss, handleless, matt, shaker) that complement your worktop and flooring.
- Order sample swatches to check colour, sheen and texture in your lighting.
- Choose handle or knob styles—or a handleless option—early to ensure hole positions suit your preference.
4) Order the full set
- Specify matching end panels, plinths and fillers to complete the look.
- Confirm hinge hole boring is compatible with your carcasses (see checklist below).
- Add soft-close hinges, drawer dampers and new handles/knobs.
- Allow for lead times; book your installation weekend once dispatch is confirmed.
5) Prepare tools and workspace
- Tape measure, combination square, and sharp pencil.
- Drill/driver with bits; 35 mm hole saw for hinge cups; countersink bit.
- Screws, hinge mounting plates, spacers/shims, spirit level, clamps.
- Fine-tooth saw or circular saw with guide for panels; block plane or scribing tool.
- Protective equipment: safety glasses, dust mask, knee pads, and work gloves.
- Dust sheets and a clean, flat surface for assembling doors.
6) Remove existing doors and hardware
- Label each removed item and keep fixings organised.
- Inspect hinge plates on carcasses; replace worn or mismatched hardware.
7) Fit hinges to new doors
- If doors arrive pre-bored, confirm cup depth and setback match your hardware.
- For unbored doors, mark and drill 35 mm hinge cups carefully; test on a spare offcut first.
8) Hang and align doors
- Mount using original or new hinge plates; start with one door per run to set references.
- Use the three-way hinge adjustments (up/down, in/out, left/right) for consistent reveals.
- Pack carcass sides with spacers where units are out of square.
9) Install handles or knobs
- Only drill handle holes after final alignment to maintain symmetry.
- Use a drilling jig for accuracy; back up the door with scrap to prevent tear-out.
10) Fit and scribe end panels
- Cut panels to length with a fine blade, then scribe to uneven walls or floors for a tight fit.
- Fix with screws from inside the carcass and construction adhesive where appropriate.
- Apply a neat bead of sealant at wall/floor junctions if required.
11) Fit plinths (kickboards)
- Cut plinths to height, accounting for any floor variation.
- Use clips or magnets for removable access; maintain ventilation for appliances.
12) Add soft-close dampers and final touches
- Fit door dampers and drawer runners per instructions.
- Wipe down surfaces, remove protective films, and polish as appropriate for the finish.
13) Final clean and handover
- Vacuum cabinet interiors; check all doors clear corners and appliances.
- Touch up exposed edges with colour-matched end caps or sealant.
A realistic sequence is Friday evening for preparation and removal, Saturday for hanging doors and handles, and Sunday for panels, plinths and finishing.
Measuring checklist to get it right first time
Before you place your order, confirm the following details to avoid costly mistakes:
- Hinge hole positions and overlay: Measure the distance from the door edge to the 35 mm hinge cup centre (commonly 21–23 mm) and confirm the hinge overlay suits your carcass thickness and door style.
- Hinge plate compatibility: Note the make/type of existing hinges. If in doubt, replace hinges and plates as a set for consistency.
- Door swing direction: Identify left/right hinged doors and ensure pairs mirror correctly on tall units.
- Appliance fascia sizes: Integrated appliance doors often differ from standard sizes; check manufacturer requirements for height, width and hinge positions.
- Corner unit clearances: Ensure adjacent doors can open without clashing; allow for handles on meeting corners.
- Plinth height: Measure existing plinths and leg settings to match new components and maintain appliance ventilation.
- Drawer front heights and stack layout: Verify each drawer pack dimension and spacing.
- Filler panels and end returns: Measure gaps to walls or pillars to order the correct width fillers.
- Tall units and ceiling lines: Check vertical clearance for any cornice or pelmet you plan to retain or add.
Doorfinder’s team can assist in confirming hinge boring and hardware choices, and can supply matching panels, plinths and fillers to simplify ordering.
Materials, finishes and hardware that stand up to daily use
Kitchens demand robust, moisture-resistant components. Prioritise the following quality markers:
- Moisture-resistant cores: Look for MR MDF or high-quality MFC cores that resist warping in humid environments.
- Durable finishes:
- Matt is forgiving of fingerprints and diffused light, ideal for busy family spaces.
- High gloss delivers striking reflectivity; use microfibre cloths and non-abrasive cleaners to keep the sheen pristine.
- Shaker profiles add texture and depth; choose wipeable finishes to simplify maintenance.
- Handleless styles (including J-pull profiles) offer clean lines; ensure compatibility with existing carcass rails or choose true-handleless systems designed for standard units.
- Edge-banding quality: Consistent, heat-bonded edging seals out moisture and improves longevity. Inspect samples for smooth seams and colour match.
- Soft-close hardware: Modern hinges and runners elevate the feel and protect doors from impact. Choose trusted brands or quality-tested equivalents.
- Colour and texture matching: Order door and panel finishes from the same range to ensure consistent tone across large surfaces and end returns.
- Seals and fixings: Stainless or zinc-coated screws, quality construction adhesive, and silicone suitable for kitchens complete a professional result.
Doorfinder offers an extensive range to suit both budget and taste—high gloss doors from £10.06, handleless from £13.01, matt from £11.65 and shaker from £21.94—along with matching panels, units and accessories (handles, hinges, storage). Sample swatches are strongly recommended to validate colour and sheen under your lighting before committing to a full set.
Avoiding pitfalls, planning time, and applying the method to wardrobes
Common pitfalls to avoid
- Mis-measurement: Double-check every width and height, and label each door location. Measure twice, order once.
- Skipping samples: Colours can shift under different lighting; confirm with swatches.
- Ignoring lead times: Place orders early and schedule your installation for when all items have arrived and been inspected.
- Uneven walls and floors: Expect to scribe panels and adjust plinths; budget time for fine-tuning.
- Drilling handle holes too soon: Align doors first; then drill using a jig for consistent results.
- Hardware mismatch: If mixing old and new hinges, ensure cup depth, overlay and plate type match. Consider standardising all hinges to soft-close.
- Appliance clearances: Check integrated appliances for ventilation and door swing requirements.
- Safety shortcuts: Wear PPE, support long panels when cutting, isolate electrics at the consumer unit if removing any switched accessories, and never attempt gas work unless you are a qualified Gas Safe engineer.
Time and skills
- A typical 10–16 door kitchen can be refreshed over a weekend by a confident DIYer:
- 2–4 hours: Audit, removal, and set-up.
- 5–8 hours: Hinge fitting, door hanging and alignment.
- 3–5 hours: Handles, panels, plinths and finishing.
- Call a professional if:
- You have stone worktops or glass splashbacks that may need specialist handling.
- Gas appliances require disconnection/reconnection (Gas Safe engineer required).
- Electrical alterations are needed (use a qualified electrician where applicable).
- Large format panels need precision cuts and you lack the tools or experience.
Bonus: wardrobe refresh for bedrooms
The same door-swap approach revitalises tired wardrobes at minimal cost. Measure each wardrobe opening, choose a coherent style—perhaps matching your kitchen for whole-home continuity—and order doors and panels to suit. Doorfinder’s wardrobe doors start from £14.27, with matching end panels and handles available for a complete bedroom refresh. Soft-close hinges and coordinated knobs deliver a premium feel for a modest outlay.
Final thought
By focusing on visible elements and following step-by-step tutorials, you can achieve a high-impact transformation for a fraction of the cost of a full refit. Reusing your existing carcasses, upgrading doors, end panels, plinths and hardware, and leaning on Doorfinder’s low prices, expert guidance and free UK mainland delivery can deliver a polished, durable finish while potentially saving several thousand pounds.