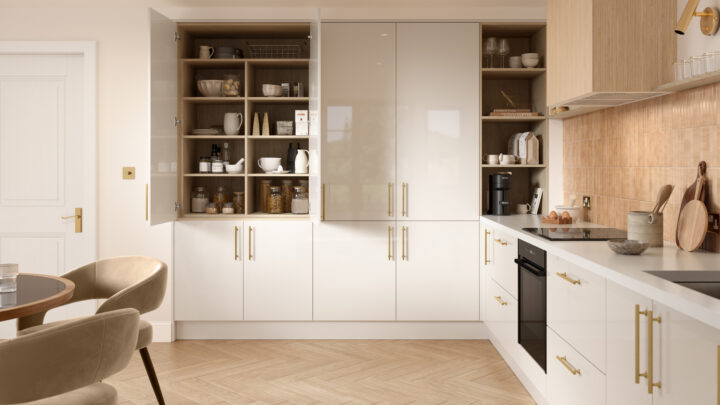
A full kitchen renovation is not always necessary to achieve a striking transformation. In most homes, the cabinet carcasses remain structurally sound for many years; it is the doors, end panels, and finishing trims that date or show wear. By replacing these visible components, you can refresh your space at a fraction of the cost and time of a complete refit.
Doorfinder specialises in replacement kitchen doors, panels, units and accessories designed for the DIY market. With high-quality products and a lowest price guarantee, it becomes practical to upgrade style and functionality without stretching your budget. Whether you prefer sleek handleless fronts from £13.01, a minimalist matt finish from £11.65, a high-gloss shine from £10.06, or timeless shaker doors from £21.94, you can tailor your kitchen’s look while maintaining control over costs. Complementary components—such as matching end panels, plinths, handles, hinges and storage solutions—help you achieve a cohesive finish.
In most cases, this project can be completed in a weekend with basic tools. You will also avoid the disruption of removing and replacing units, plumbing, and worktops. With Doorfinder’s expert advice and free delivery across the UK mainland, a made-over kitchen is simpler and more affordable than you might expect.
Plan, Measure and Choose: Getting the Details Right
Careful planning is essential for a smooth installation and a refined result. The following steps will help you prepare with confidence.
- Take stock of your layout
- List the number of doors, drawer fronts, and any panels to replace (end panels, infill panels, plinths, cornice and pelmet).
- Note which doors are left- or right-hinged and where handles are positioned.
- Identify any special pieces: bi-fold doors, glass doors, integrated appliance doors or tall larder doors.
- Measure accurately
- Remove one door at a time and measure width and height in millimetres. Common carcass widths are 300, 400, 500, 600, 800 and 900 mm, but always confirm your exact sizes.
- Measure hinge-hole centres if reusing existing cabinet hinge plates: the standard hinge cup is 35 mm diameter, typically set 3–5 mm from the door edge, with centres a set distance from the top/bottom. Record these measurements for consistency.
- Measure end panels and plinths. Allow a little extra for scribing where walls or floors are out of square.
- Select your style and finish
- High gloss (from £10.06): enhances light and creates a contemporary, reflective surface ideal for modern spaces.
- Matt (from £11.65): delivers a smooth, refined look that hides fingerprints and pairs well with most worktops.
- Handleless (from £13.01): streamlined and modern, ideal for minimal, clutter-free aesthetics.
- Shaker (from £21.94): a classic framed profile that suits both traditional and transitional interiors.
- Choose accessories for function and finesse
- Handles and knobs: select finishes to coordinate with taps and appliances (brushed steel, chrome, black, brass).
- Hinges: consider soft-close hinges for a premium feel.
- Storage: add pull-outs, corner solutions and drawer organisers to improve everyday use.
- Finishing trims: matching end panels, cornice, pelmet and plinths produce a built-in, bespoke appearance.
- Budget smartly
- Start with doors, then add panels and trims. Because Doorfinder’s ranges start at very competitive prices, you can elevate your selection—such as upgrading to soft-close hardware—while staying within budget.
- Build your basket with realistic quantities. For example, a modest galley kitchen might require 8–12 doors and a few drawer fronts; exact costs will vary by sizes and selections, but Doorfinder’s lowest price guarantee helps ensure you are not paying over the odds.
If you are unsure about sizing or hinge positions, Doorfinder’s expert advice is available to guide you before you commit to an order.
Step-by-Step: Removing, Fitting and Aligning New Doors and Panels
Replacing kitchen doors is approachable for a confident DIYer. The right tools and a methodical approach will deliver professional results.
Tools and materials checklist
- Tape measure, pencil and notepad
- Screwdrivers (Pozidriv/Phillips), drill/driver
- 35 mm Forstner bit if doors will be supplied undrilled
- 2 mm or 3 mm drill bits for pilot holes
- Spirit level and square
- Masking tape and a handle drilling template (optional but helpful)
- Fine-tooth saw or circular saw with a suitable blade for panels and plinths
- Sanding block, edge tape (if required)
- Wood screws, adhesive for panels, and protective pads (door buffers)
- Safety glasses and dust mask
1) Remove old doors and prepare
- Support each door, then undo the hinge screws at the cabinet plate. Label each location (e.g., “Sink Base, Left”) and keep hardware if you plan to reuse it.
- Remove handles and store any fixings. If you intend to replicate handle positions, record the measurements.
- Clean the face of cabinet carcasses and check that hinge plates are secure. Tighten or reposition if necessary.
2) Mark and drill (if needed)
- If your new doors are undrilled, carefully mark hinge cup positions. Typical cup diameter is 35 mm. Use a depth stop on the Forstner bit to avoid drilling through the door. If you prefer not to drill, consult Doorfinder for guidance on options and best practices.
- For handles, mark the hole centres using a template or a temporary jig so all handles align consistently. Place masking tape over the drilling point to reduce surface chipping on gloss or painted finishes.
3) Fit hinges to the doors
- Attach hinges to each door, ensuring the cups seat fully and the screws are snug but not over-tightened. Fit soft-close hinges where preferred.
4) Hang and align
- Clip or screw the door onto the cabinet hinge plates. Close the door and assess the gaps around the perimeter (the “reveal”).
- Use the three-way adjustment on modern hinges:
- Side-to-side to even the gaps across adjacent doors.
- Height to align top and bottom edges.
- In/out (depth) to bring the door flush with the cabinet front.
- Work across the run of units, aligning handles and maintaining consistent reveals of 2–3 mm for a refined finish.
- Stick protective buffers on the inner corners to soften closing and reduce noise.
5) Install handles and knobs
- Drill pilot holes from the face side with care, then open the hole from the back to minimise breakout. Fit hardware and tighten by hand to avoid marking the finish.
6) Panels, plinths and trims
- End panels: Cut to size, then scribe to walls or floors that are not perfectly square. Fix from inside the cabinet using screws, or use a suitable grab adhesive and clamp until set. Conceal any cut edges where possible; apply matching edge tape as required.
- Plinths (kickboards): Measure between corner posts, cut with a fine-tooth blade, and clip or screw in place. Maintain an even shadow line along the floor.
- Cornice and pelmet: Mitre corners neatly; pre-drill and fix from the back or top where feasible for a hidden fix.
- Check for level lines across the run; minor adjustments to hinge settings and plinth height will help you achieve a straight, continuous sightline.
7) Final checks and aftercare
- Wipe surfaces with a soft, non-abrasive cloth. Avoid harsh chemicals on painted or gloss finishes.
- Re-tighten hinge and handle screws after a week of use as materials settle.
- Consider heat deflectors near ovens or dishwashers to protect adjacent door edges.
Safety and quality tips
- Always wear eye protection when drilling or cutting.
- Support long doors and panels when cutting to prevent chipping.
- Test-fit one door before drilling the rest to confirm hinge and handle positions.
- If cabinets are out of square, use hinge adjustments and scribing for the best visual alignment.
Make It Effortless with Doorfinder: Value, Service and Confidence
Your choice of supplier can make the difference between a smooth, budget-friendly update and a frustrating project. Doorfinder focuses on delivering the best of both worlds—excellent products and exceptional value—so you can install with confidence.
- Lowest price guarantee: Keep costs under control. With entry prices such as high gloss from £10.06, matt from £11.65, handleless from £13.01 and shaker from £21.94, you can achieve a high-end look for less.
- Expert advice: Gain clarity before you buy. Whether you need assistance confirming sizes, hinge positions, or selecting compatible accessories, Doorfinder’s team is on hand to help you make informed choices.
- Free UK mainland delivery: Save on logistics. Order online around the clock and have everything delivered to your door, ready for your weekend project.
- Complete range in one place: Beyond kitchen doors, you will find matching panels, kitchen units, hinges, handles and storage solutions—plus wardrobe doors from £14.27 if you decide to extend your refresh into the bedroom.
Before you check out, use this quick ordering checklist:
- Door style, colour and finish confirmed for each cabinet
- Exact sizes and hinge side (left/right) recorded
- Hinge specification chosen (standard or soft-close)
- Handle type, finish and centre-to-centre measurement selected
- Matching end panels, plinths, cornice and pelmet included
- Any fillers, scribes and edge tape accounted for
- Storage upgrades identified for key cabinets (bins, pull-outs, dividers)
Transforming your kitchen on a budget is entirely achievable with thoughtful planning and the right components. By focusing on high-impact elements—doors, panels and finishing trims—you will revitalise your space quickly, cleanly and cost-effectively. With Doorfinder’s affordability, expert guidance and free mainland delivery, your next kitchen makeover can be as efficient as it is elegant.