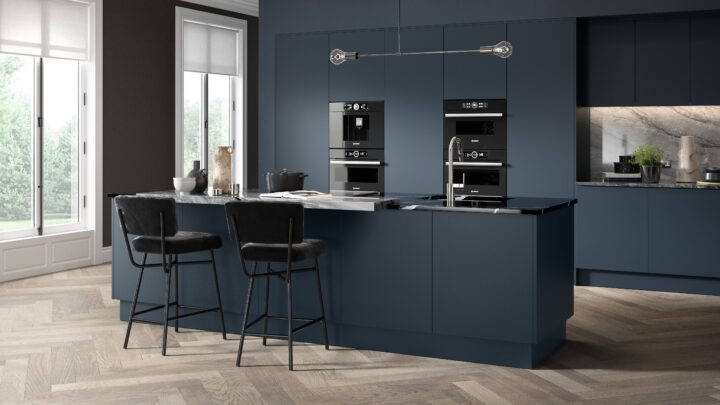
When improvement costs are under scrutiny, replacing doors, drawer fronts and end panels—rather than the full cabinet—delivers a high‑impact upgrade with minimal disruption. By retaining sound carcasses, you can reduce spend, shorten lead times and limit waste, all while achieving a showroom‑worthy finish.
Doorfinder specialises in this exact approach for kitchens and bedrooms. You will find high‑quality replacement kitchen doors and wardrobe doors, panels and units at genuinely budget‑friendly prices, alongside expert advice and free delivery across the UK mainland. Typical starting prices include:
- High gloss kitchen doors from £10.06
- Matt kitchen doors from £11.65
- Handleless kitchen doors from £13.01
- Shaker kitchen doors from £21.94
- Wardrobe doors from £14.27
With a lowest price guarantee, around‑the‑clock online ordering and a London head office, Doorfinder makes a fast, low‑mess refresh straightforward—often achievable over a weekend.
Benefits at a glance:
- Significant savings versus a full remodel
- Faster turnaround with minimal downtime
- Less mess and disruption at home
- Reduced waste by reusing carcasses and serviceable hardware
- A tailored aesthetic with coordinated trims for a built‑in look
Plan it right: assessing, measuring and choosing your look
1) Confirm your carcasses are sound
Check that cabinets are level, square and securely fixed to walls/floors. Inspect for:
- Water damage, swelling or delamination (especially near sinks and appliances)
- Loose or stripped hinge screw points
- Sagging shelves or failed fixings
If any units are compromised, replace those carcasses first—Doorfinder also supplies compatible kitchen units—then proceed with new fronts.
2) Measure accurately (doors, drawers, end panels)
Work in millimetres. Replacing like‑for‑like sizes is simplest; measure the existing front, not the opening, unless you are changing the overlay style.
- Doors: Measure width × height of each door. Note hinge side (left/right) and quantity. Measure your existing hinge cup centre distances from the top and bottom edges, and the setback from the door edge. Photograph each door back as a record.
- Drawer fronts: Measure width × height for each drawer. For a stacked bank, confirm combined heights align with the carcass opening.
- End panels: Measure width and height of the face to be covered. Allow a small scribe margin (typically 2–5 mm) for out‑of‑plumb walls. Decide on flush, proud or inset finishes relative to doors.
- Plinths, cornices and pelmets: Measure total run lengths, including returns. Plan for mitred corners and any appliance gaps.
Tip: Order doors pre‑drilled for hinges where possible to save time and ensure accuracy. If mixing door sizes, use a labelling system and a simple plan view sketch to avoid confusion during installation.
3) Choose styles that suit your space and routine
- High gloss: Reflects light to make compact or low‑light kitchens feel larger and brighter. Excellent for modern schemes and easy daily wipe‑downs.
- Matt: Understated, contemporary and calm. Resists glare and fingerprints better than gloss, ideal for open‑plan spaces.
- Shaker: Timeless frame detail that suits both classic and modern homes. Pairs well with warm neutrals, woods and traditional hardware.
- Handleless: Clean, sleek lines with either J‑pull profiles or push‑to‑open mechanisms. Ideal for a minimal, uninterrupted look.
4) Coordinate colour and finishes for a built‑in feel
- Match or deliberately contrast doors with end panels and trims (plinths, cornices and pelmets) for a cohesive finish.
- Use continuous plinths to visually ground base cabinets.
- Cornices and pelmets help integrated lighting look purposeful and hide under‑cabinet fixtures.
- Consider warm metals (brass, bronze) with shaker; cool metals (chrome, stainless) with gloss and handleless; black or graphite with matt finishes.
5) Plan hardware and simple storage upgrades
- Hinges: Soft‑close concealed hinges upgrade the feel instantly; add clip‑on dampers if you are retaining existing hinges.
- Handles: Bars for modern practicality, knobs for classic charm, edge pulls for minimal visual interruption, or push‑to‑open for true handle‑free operation.
- Storage: Retrofittable pull‑out larders, corner solutions (carousel or LeMans‑style trays), deep‑drawer organisers, tray dividers and integrated recycling bins greatly increase day‑to‑day efficiency without replacing carcasses.
Hardware and storage that elevate everyday use
Small enhancements can transform workflow as much as new fronts do.
- Pull‑out larders: Turn tall, narrow cupboards into high‑visibility storage.
- Corner solutions: Replace lost space with swivel trays or articulated shelves you can fully access.
- Drawer upgrades: Fit soft‑close runners, cutlery inserts and pan dividers; consider converting a cupboard to a deep drawer for easier access.
- Bins and recycling: Integrated multi‑bucket pull‑outs keep floors clear and sorting simple.
- Lighting: Add discreet LED strips beneath pelmets for task lighting that flatters high gloss, or warm under‑cabinet lighting to complement matt and shaker finishes.
- Bedrooms: For wardrobes, replace tired fronts and add pull‑down hanging rails, shoe racks or drawer organisers for a boutique feel without a full refit.
A weekend installation guide
Preparation
- Clear and protect work areas; cover worktops and floors.
- Photograph existing layouts and label each door/drawer as you remove it.
- Check deliveries against your plan and acclimatise panels and doors in the room for a few hours.
Basic tools
- Tape measure, sharp pencil, combination square
- Spirit level and a set of plastic packers/spacers (2–4 mm)
- Screwdrivers or a cordless driver with Pozi bits
- Drill/driver; 35 mm Forstner bit only if you must drill hinge cups yourself
- Clamps, masking tape and a soft mallet
- Fine‑tooth saw or mitre saw for cornice/pelmet/plinth trimming
- Safety gear: gloves and eye protection
Step‑by‑step
1) Remove old fronts and hardware
Unscrew handles, hinges and drawer fronts. Keep hinge plates if reusing. Fill any redundant face holes you will not cover.
2) Fit hinges to new doors
If pre‑drilled, clip in soft‑close hinges. If not, mark and drill hinge cups with care—test on an offcut first.
3) Mount hinge plates to carcasses
Position plates to match your previous settings, or follow manufacturer guidance for setback and height. Lightly tighten.
4) Hang and align doors
Clip doors to plates. Using 3‑way hinge adjustment, set:
- Height to line up top/bottom edges across a run
- Side to achieve even 2–3 mm reveals between doors
- Depth so doors sit flush with end panels and neighbouring fronts
Use 2–3 mm spacers between doors whilst tightening to maintain consistent gaps.
5) Fit drawer fronts
From inside the drawer box, clamp the front in position with spacers for even margins, drill pilot holes and fix. Adjust runners for level and projection.
6) Install end panels
Scribe to walls/floors, then fix from inside the cabinet with screws and/or suitable adhesive. Keep panels square and consistent with door projections. Finish with colour‑matched edge trims where required.
7) Add plinths, cornices and pelmets
Cut to length and mitre corners. Use clips or discreet screws for plinths to allow future access. Fit pelmets before under‑cabinet lighting for a seamless result.
8) Fit handles (if using) or push‑to‑open mechanisms
Create a drilling jig for repeatable handle placement. For handleless J‑pull doors, ensure even finger‑pull reveals along the run.
9) Install storage upgrades and test
Add larders, bins and corner mechanisms according to instructions. Load lightly at first and check smooth operation.
10) Final clean and sign‑off
Peel protective films, clean surfaces and check all fixings. Adjust any remaining reveals.
Practical tips
- Small kitchens: Choose lighter colours or high gloss to bounce light; opt for slim bar handles or handleless doors to keep sightlines clean; continue wall units to the ceiling to increase perceived height; use integrated bins to free floor space.
- Rental‑friendly changes: Use existing hinge positions, choose clip‑on soft‑close and avoid drilling carcasses where not necessary. Keep original doors safely stored so you can reinstate them if needed.
- Fast wardrobe refresh: Measure carefully (door height, width and hinge positions), choose matt or shaker for a calming bedroom feel, or gloss/handleless for contemporary impact. Add soft‑close hinges and simple interior organisers for a premium finish with minimal effort.
Budget, checklist, care and showing your results
A basic budget planner (illustrative)
- Replacement kitchen doors: from £10.06–£21.94+ each depending on style
- Wardrobe doors: from £14.27 each
- End panels and trims (plinths, cornices, pelmets): allow a modest per‑run allocation
- Hinges and plates: budget per door for soft‑close
- Handles or push‑to‑open: cost per door/drawer
- Storage upgrades: line‑item for each (pull‑out larder, corner solution, bins, organisers)
- Consumables/tools: screws, spacers, adhesive, drill bits
- Contingency: 10–15% for unforseen adjustments
Example small kitchen (guide only): 10 doors + 3 drawer fronts + 2 end panels, new hinges and handles, plus integrated bin and a corner tray—typically a fraction of the cost of a full refit, especially with Doorfinder’s lowest price guarantee and free UK mainland delivery.
Your weekend checklist
- Assess carcasses; repair or replace any compromised units
- Measure every door, drawer and panel; note hinge data and handings
- Choose style and colour; coordinate trims and handles
- Plan hardware and storage upgrades
- Order pre‑drilled doors where possible
- Prepare tools, spacers and protective coverings
- Remove old fronts; install new doors, drawers and panels
- Fit trims, handles and storage; adjust reveals; clean down
- Photograph results (same angles, good light) for a before‑and‑after record
Care and cleaning by finish
- High gloss: Wipe with a soft microfibre cloth and warm, diluted washing‑up liquid. Buff dry to remove water marks. Avoid abrasive pads and ammonia/solvent cleaners. Fingerprints are normal; a quick buff restores shine.
- Matt: Clean with a soft cloth and mild soapy water. Avoid polishes that add sheen. For marks, use a diluted, non‑abrasive cleaner; dry thoroughly.
- Shaker (vinyl/painted): Dust the frame detail with a soft brush; wipe with a non‑abrasive cleaner. Do not allow standing water or steam to linger on joints; use a kettle mat or relocate steam appliances.
- Handleless profiles: Clean J‑pull channels regularly with a soft brush and cloth to prevent debris build‑up. For true handleless rails, wipe the aluminium/steel profile with a damp cloth and dry.
- Hinges and runners: Annually check fixings and adjust. A light clean keeps soft‑close action smooth.
Showcasing your transformation
- Take “before” photos in natural light, straight on; repeat with “after” from the same height and angle.
- Capture wide shots of full runs and close‑ups of details (handle finishes, even reveals, soft‑close hinges, storage pull‑outs).
- In bedrooms, show the wardrobe elevation closed and an interior shot with upgraded organisers.
- If you intend to sell, a crisp set of before‑and‑afters helps buyers appreciate the care and freshness of your kitchen or wardrobes, supporting stronger first impressions and potential resale appeal.
Doorfinder is ready to support your project with advice and unmatched value. Explore high gloss, matt, shaker and handleless doors—from £10.06—and wardrobe doors from £14.27, plus panels, units, hinges, handles and smart storage. With the lowest price guarantee and free UK mainland delivery, you can plan with confidence and transform your home on a budget—without the upheaval of a full refit.