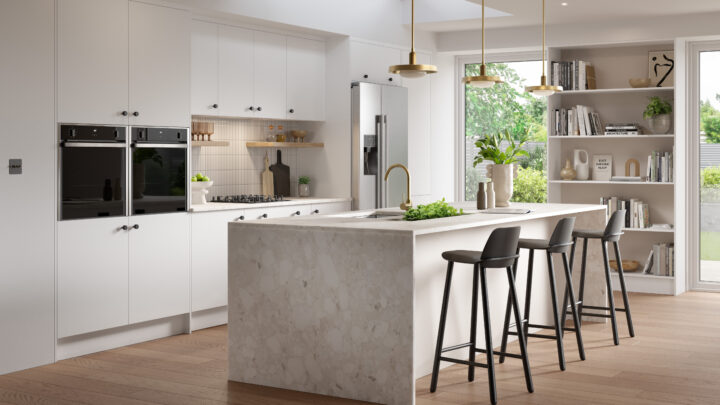
If your cabinet frames are sound, replacing only the visible elements—doors, drawer fronts, and end panels—can deliver the impact of a full refit at a fraction of the cost and disruption. This approach enables you to refresh style, colour and finish without discarding perfectly serviceable units or altering the kitchen layout you already know works.
Key advantages include:
- Significant savings: You keep your existing carcasses, worktops and services, reducing labour and material costs dramatically.
- Speed and minimal disruption: Most projects can be completed over a weekend with basic tools, keeping your kitchen usable.
- Sustainable by design: Reusing quality carcasses avoids unnecessary waste and reduces the carbon footprint of your refurbishment.
- Design flexibility: From sleek, contemporary gloss to timeless shaker, you can overhaul the look to suit your taste and home.
- Incremental upgrades: Replace doors first, then add new handles, soft-close hinges, storage, and matching panels as budget allows.
Doorfinder specialises in this precise upgrade path, offering high-quality replacement kitchen doors and panels at unbeatable prices. The range includes:
- High gloss doors from £10.06 — a polished, light-enhancing finish perfect for modern spaces
- Handleless doors from £13.01 — streamlined and contemporary
- Matt doors from £11.65 — understated, tactile and forgiving on fingerprints
- Shaker doors from £21.94 — a classic framed look that suits both period and modern homes
Beyond kitchens, wardrobe doors start from £14.27 for bedroom projects, and there is a full selection of panels, kitchen units, and accessories including handles, hinges and storage solutions. With Doorfinder’s lowest price guarantee, expert advice, and free delivery across the UK mainland, you can plan with confidence and keep costs firmly under control.
Choose the right style, finish, and accessories
Selecting the correct combination of style, colour and hardware is where you achieve the “brand-new kitchen” feel.
Style and proportion
- Small kitchens benefit from high gloss kitchen door or lighter-tone matt finishes to maximise reflected light.
- Busy family spaces often favour matt or shaker styles for their forgiving surfaces and robust character.
- Contemporary schemes lean toward handleless doors for a clean, continuous line; traditional or transitional homes suit shaker kitchen doors or simple slab fronts.
Colour strategy
- Neutral foundations (whites, greys, taupes) create a calm backdrop that works with most worktops and floors.
- Two-tone combinations add depth: consider darker base units with lighter wall units to balance weight.
- Warm woods or wood-effect panels can soften a very sleek scheme and harmonise with timber worktops or flooring.
Practical finishes
- Gloss is easy to wipe and excels at amplifying light but shows smudges more readily; ideal for low-touch zones or smaller rooms.
- Matt conceals fingerprints and offers a refined, modern look; choose higher-sheen matt in darker colours to maintain cleanability.
- Shaker kitchen doors adds texture and interest; opt for a narrow frame for a modern twist or a wider frame for a heritage feel.
Handles and hardware
- Handles are a cost-effective design pivot. Brushed brass warms cool palettes; black or graphite completes monochrome schemes; stainless steel is timeless and durable.
- Soft-close hinges deliver a premium feel and protect door edges; they are a simple swap during installation.
- Matching hinges and handles from Doorfinder ensure consistent quality and fit, with options to suit all door styles.
Panels and finishing details
- End panels and decor panels finish exposed unit sides and islands, making the upgrade look truly built-in.
- Plinths, cornice and pelmet provide a completed, custom look; coordinate colours and profiles with your chosen doors.
- For integrated appliances, ensure your chosen door style and size are compatible with appliance front kits.
Storage enhancements
- Consider adding pull-out baskets, corner solutions and tray dividers to improve function without changing the layout.
- Upgrading a few internal elements while you replace doors and panels maximises day-to-day usability for minimal extra spend.
Plan, measure, and order: a simple framework
Accurate planning makes for a smooth DIY installation. Follow this logical sequence:
1) Audit your existing kitchen
- Confirm that carcasses are square, secure and dry; tighten any loose fixings.
- Note which doors open left or right and record any non-standard units.
- Identify all visible sides and ends that will need matching panels.
2) Measure carefully
- Measure existing doors and drawer fronts, not just the openings. Record width × height to the nearest millimetre.
- Note hinge positions on each door by measuring from the top edge to the centre of each hinge hole (and from the bottom if applicable). Record door handing.
- For end panels, measure the full visible height and depth; allow for scribing against uneven walls if needed.
3) Choose specification
- Select door style, finish and colour alongside coordinating panels and plinths.
- Decide on handle type and placement or choose handleless doors for a streamlined look.
- Add hinges (including soft-close), screws, and any storage upgrades to your basket so everything arrives together.
4) Order with confidence
- Doorfinder’s around-the-clock online service makes it easy to order when it suits you.
- Benefit from the lowest price guarantee and free delivery across the UK mainland to keep your budget predictable.
- If in doubt about sizing or hinge positions, make use of Doorfinder’s expert advice before you checkout.
5) Prepare the workspace
- Clear and protect your worktops and floor with dust sheets or cardboard.
- Assemble tools: tape measure, pencil, drill/driver, 35 mm hinge cutter (if hinges are not pre-drilled), smaller drill bits for pilot holes, screwdriver set, spirit level, clamps, and a square.
- Consider painter’s tape to mark handle positions and avoid surface scratches during handling.
Step-by-step installation for DIY enthusiasts
Undertaking the installation yourself is straightforward with careful preparation. The process below is intentionally methodical to help you achieve a professional finish.
1) Remove existing doors and hardware
- Support each door while releasing the hinges from the mounting plates.
- Bag and label old hinges and screws in case you need reference during reassembly.
- Remove handles and keep one door as a template if helpful.
2) Fit new hinges to doors (if not factory-fitted)
- If your doors arrive pre-drilled for hinges, align and fix hinges using the supplied screws.
- If drilling hinge cups yourself, mark hole centres from your measurements (or from a template door), clamp a backing scrap to prevent tear-out, and cut clean 35 mm cups to the correct depth. Always drill a pilot for fixing screws.
3) Install or adjust carcass mounting plates
- Fit new mounting plates in the same positions as the old ones or adjust as needed to suit new doors.
- Ensure plates are level across a run of units to simplify final alignment.
4) Hang doors
- Starting with a corner unit, clip the hinges onto the mounting plates and check basic alignment.
- Maintain consistent gaps (reveals) between doors and between doors and carcass edges for a crisp, fitted look.
5) Fine-tune alignment
- Use the hinge’s three-way adjustment to set height, depth and side-to-side alignment.
- Step back regularly and check lines across adjacent doors and drawer fronts.
6) Fit handles (if applicable)
- Mark handle positions using a jig or a carefully measured template to ensure consistency.
- Drill from the face through low-speed and with a sharp bit to avoid chipping; de-burr from the back and fit with the supplied bolts.
7) Install end panels and finishing trims
- Dry-fit panels to check coverage and scribe where walls are out of true.
- Fix with suitable screws from inside the carcass or with a quality adhesive where appropriate; keep edges flush with door faces for a furniture-grade finish.
- Fit plinths, cornice and pelmet, ensuring mitres are tight and lines are straight.
8) Add storage and soft-close upgrades
- Install pull-outs or internal drawers according to the manufacturer’s instructions.
- Clip soft-close dampers into place if they are separate from the hinges.
9) Final checks and clean-down
- Open and close every door and drawer to confirm smooth operation and clearances.
- Wipe surfaces with a soft, non-abrasive cloth and mild cleaner suitable for the chosen finish.
Safety note: Always wear eye protection when drilling and cutting. If your project involves any electrical or plumbing modifications, consult a qualified professional.
Why choose Doorfinder for your project
Doorfinder focuses exclusively on helping DIY customers transform kitchens and bedrooms with minimal cost and effort. That specialisation translates into real-world advantages:
- Unbeatable value: With doors such as high gloss from £10.06, handleless from £13.01, matt from £11.65, and shaker from £21.94, you can refresh your entire space without the full-renovation price tag.
- Depth of range: Coordinating wardrobe doors from £14.27, end panels, kitchen units, and a wide choice of handles, hinges and storage solutions simplify sourcing.
- Service built for DIY: Around-the-clock online ordering, expert advice when you need it, and free delivery across the UK mainland keep the process straightforward and budget-friendly.
- Confidence and credibility: A lowest price guarantee underpins value, while a London head office and UK-wide reach make Doorfinder an accessible, reliable partner for your project.
With the right measurements, a clear design direction, and quality components, replacing your doors and panels is one of the most effective upgrades you can make. Explore Doorfinder’s range, select your style, and enjoy a kitchen that looks and feels new—delivered on time, on budget, and built to last.