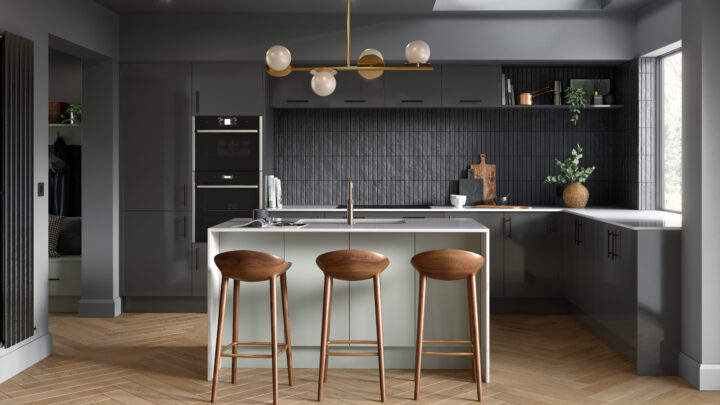
A full kitchen refit is disruptive, costly, and often unnecessary if your cabinet carcasses are sound. By replacing only the doors, drawer fronts, and visible panels, you refresh the look and feel of your space at a fraction of the price, with less waste and minimal downtime.
A realistic comparison for a typical 10–12 unit kitchen:
- Full refit (new carcasses, standard laminate worktop, mid-range doors, excluding appliances): commonly £3,000–£6,000 including installation, depending on specification and region.
- Door-and-panel refresh using Doorfinder:
- 12 replacement doors (mix of sizes), assuming a mid-range style average between Doorfinder’s entry prices: approximately £200–£400 if you choose cost-effective finishes such as high gloss from £10.06, handleless from £13.01, matt from £11.65, or shaker from £21.94.
- 2–4 end panels and plinths: approximately £120–£300 depending on sizes and finish.
- New hinges and handles (if required): approximately £60–£180 depending on quantity and specification.
- Total typical spend: roughly £380–£880 for many small to mid-size kitchens.
Even accounting for extras (sealants, screws, a hole saw or jig you may not already own), most DIYers complete a weekend makeover comfortably under £1,000. In short, you can often achieve 70–90% savings versus a full refit while retaining the solid framework of your kitchen.
Doorfinder helps you keep the budget tight and the timeline short with:
- Lowest price guarantee to ensure you are not overpaying for comparable products.
- Expert advice to confirm measurements, hinge choices and finishing details before you order.
- Free UK mainland delivery to eliminate carriage costs and simplify scheduling.
- 24/7 online ordering from a London-based head office, so you can plan and purchase at your convenience.
Plan your new look: measuring, styles, and matching components
A successful weekend makeover begins with precise measurements and a clear style decision.
1) Measure accurately
- Doors: Measure each door’s width and height in millimetres (mm). Record every item; kitchens often have multiple similar sizes with subtle variations.
- Drawer fronts: Measure height and width, noting stack arrangements (e.g., 140/140/283 mm typical combinations).
- Hinge positions: Note the distance from the top and bottom edges of each door to the centre of the hinge cup, and the hinge cup setback from the door edge. Photograph hinge plates inside cabinets for reference.
- End panels: Measure the visible faces of cabinet ends. If panels run to the floor, measure floor-to-worktop height and check for uneven floors that may require scribing.
- Plinths (kickboards): Measure overall lengths and standard height (often 150 mm, but verify). Note any cut-outs for corners or appliance vents.
Tip: Label old doors and keep them until new ones are fitted. They serve as templates for hinge positions and handle hole spacing.
2) Choose your style and finish
Doorfinder offers a broad range to suit any scheme and budget:
- High gloss doors from £10.06: Ideal for a light-maximising, modern look. Wipe-clean surfaces suit busy households.
- Handleless doors from £13.01: Sleek “J-pull” profiles deliver uninterrupted lines without separate handles.
- Matt doors from £11.65: Contemporary and understated, excellent for concealing fingerprints.
- Shaker doors from £21.94: A timeless framed style that bridges classic and modern kitchens.
If you are mixing existing worktops and flooring, bring a sample or a good photograph into your decision. Whites and soft greys are the most forgiving with mixed materials; wood-effect panels can warm a cool palette.
3) Match end panels, cornice, and plinths
- End panels: Choose the same finish as your doors to achieve a seamless, “designed” look. Where cabinets meet walls, order panels slightly oversize for scribing to any irregularities.
- Plinths: Match or contrast. A matching plinth blends, while a contrasting dark plinth visually grounds the kitchen and hides scuffs.
- Corner posts, filler pieces, and light pelmets: If visible, plan these pieces in the same finish to avoid mismatched tones.
4) Hinges and handles
- Hinges: Most kitchens use 35 mm concealed cup hinges. Identify overlay type:
- Full overlay for standard doors covering the carcass side.
- Half overlay for shared partitions.
- Inset for doors sitting within the frame.
Choose soft-close hinges for a modern, quiet close. Confirm door thickness and hinge cup depth compatibility before ordering.
- Handles: If not choosing handleless, decide on bar, knob, or cup styles, and confirm hole centres (e.g., 96 mm, 128 mm). For retrofits, you may reuse existing hole centres or fill/swap to a new position.
Note: If a carcass is damaged beyond a simple repair, Doorfinder also supplies kitchen units so you can replace an isolated cabinet and still match the finish across doors, panels and accessories.
Order with confidence: keeping costs down and your weekend on schedule
Before you place your order, use Doorfinder’s resources to remove guesswork.
- Lean on expert advice: Share your measurements, hinge details and end-panel requirements. Clarify overlay type and any unusual cabinets (bi-folds, corner units, integrated appliance doors). An expert check reduces the risk of mis-ordered parts.
- Use the lowest price guarantee: If you find a comparable item at a lower price elsewhere, contact Doorfinder to take advantage of the guarantee. This helps you stick tightly to budget without downgrading quality.
- Take advantage of free UK mainland delivery: Schedule delivery for at least a few days before your planned weekend. Inspect items on arrival and store them flat, on a dry, level surface.
- Finalise accessories: Add hinges, handles, soft-close add-ons, and any storage solutions (pull-outs, bins) at the same time to avoid mid-project runs to the shop.
- Build a simple plan: Assign Friday evening to clearing and labelling, Saturday to removal and fitting, and Sunday to alignment, finishing touches and tidying.
Checklist before you click “Order”:
- Confirm every door and drawer front size in mm
- Count hinge quantities per door (usually 2 for doors up to ~900 mm high; 3 for taller)
- Identify overlay type (full, half, inset)
- Note handle hole centres or choose new handle positions
- Add matched end panels, plinths and any fillers
- Include hinges, plates, screws and buffers if needed
- Confirm lead times and delivery window
Your weekend playbook: tools, fitting sequence, and pro tips
Tools and materials checklist
- Tape measure, steel rule, and pencil
- Spirit level and square
- Drill/driver with bits (including 2 mm–3 mm for pilots)
- 35 mm Forstner bit or hinge jig (if you need to drill hinge cups)
- Screw assortment appropriate for hinges and handles
- Masking tape, sharp knife, and wood chisel
- Countersink bit, rubber mallet, and clamps
- Fine-tooth saw or circular saw with a track (for scribing panels and plinths)
- Sanding block, edge sealant or colour-matched wax/filler
- Safety glasses and dust mask
Step-by-step fitting sequence
1) Prepare and protect
- Clear worktops and floors. Lay protective sheets.
- Photograph current door alignment and hinge positions for reference.
- Turn off any under-cabinet lighting and isolate electrics where panels run close to spurs.
2) Remove old doors and hardware
- Support each door while loosening hinge screws from the plate. Keep screws in labelled bags by cabinet.
- Remove handles, keeping them as templates if reusing hole centres.
- Take off plinths and end panels carefully to avoid damaging carcasses.
3) Check and tune the carcasses
- Verify cabinets are plumb and level. Minor shimming under legs now will pay off in clean door lines later.
- Tighten loose hinge plates and repair stripped screw holes with dowels or wood filler where needed.
4) Dry-fit new doors
- Mark hinge cup locations based on your notes or by transferring from old doors.
- If drilling hinge cups, use a 35 mm Forstner bit with a depth stop; keep a 5–6 mm margin from the door edge.
- Attach hinges to the door first, then offer the door to the cabinet and fix to hinge plates. Alternatively, fix plates to the carcass first and hang the door—choose the sequence that gives you best control.
5) Fit end panels
- Cut panels oversize by 2–3 mm where walls or floors are out of true.
- Scribe to the wall/floor using a compass, then trim with a fine-tooth saw or track saw. Finish edges cleanly and seal any exposed core per manufacturer guidance.
- Fix panels from inside the carcass with suitable screws to hide fixings.
6) Install plinths
- Clip or screw plinths to legs, maintaining consistent height and tight joins at corners.
- Include ventilation where appliances require it.
7) Handles and finishing touches
- For new handle positions, create a drilling template to ensure consistent heights and hole centres across doors and drawers.
- Deburr holes and fit handles with machine screws of correct length to avoid dimpling the front.
- Add door buffers and, if desired, soft-close adapters.
8) Align and perfect
- Use the three-way adjustment on concealed hinges:
- Left/right to set even side gaps (reveals)
- In/out to set door flushness with the cabinet front
- Up/down to align door tops and bottoms across runs
- Aim for consistent gaps of 2–3 mm between doors. Step back frequently to check sight lines in natural light.
Common mistakes to avoid
- Rushing measurements: Double-check every size; do not assume symmetrical runs are identical.
- Mixing overlays: Ordering a full overlay door for a carcass that needs half overlay will misalign gaps.
- Forgetting end panels: Unfinished carcass ends will betray a refresh instantly.
- Over-tightening screws: This can strip fixings or dimple door faces; use pilot holes and a controlled clutch setting.
- Ignoring floor levels: Plinths must follow the floor; scribe rather than forcing a level line that leaves gaps.
- Late deliveries: Schedule free UK mainland delivery to arrive mid-week; inspect immediately so any issues can be resolved before the weekend.
Keeping momentum and budget discipline
- Batch work: Drill all handle holes before fitting handles; hang all doors before fine adjustments.
- Use Doorfinder’s expert advice mid-project if you encounter an unusual hinge or a corner unit question.
- If you find a like-for-like product cheaper, invoke the lowest price guarantee rather than compromising on quality.
- Leverage free delivery by consolidating your order—doors, panels, hinges, handles, and storage accessories—to avoid last-minute purchases.
With careful planning, precise measuring, and the right components, you can transform a tired kitchen over a single weekend. Doorfinder’s breadth of styles—from high gloss from £10.06 and matt from £11.65 to handleless from £13.01 and classic shaker from £21.94—means there is an option for every budget and design. Match your end panels and plinths, choose hinges and handles wisely, and follow the fitting sequence above to achieve a showroom-level finish without the upheaval or expense of a full refit.