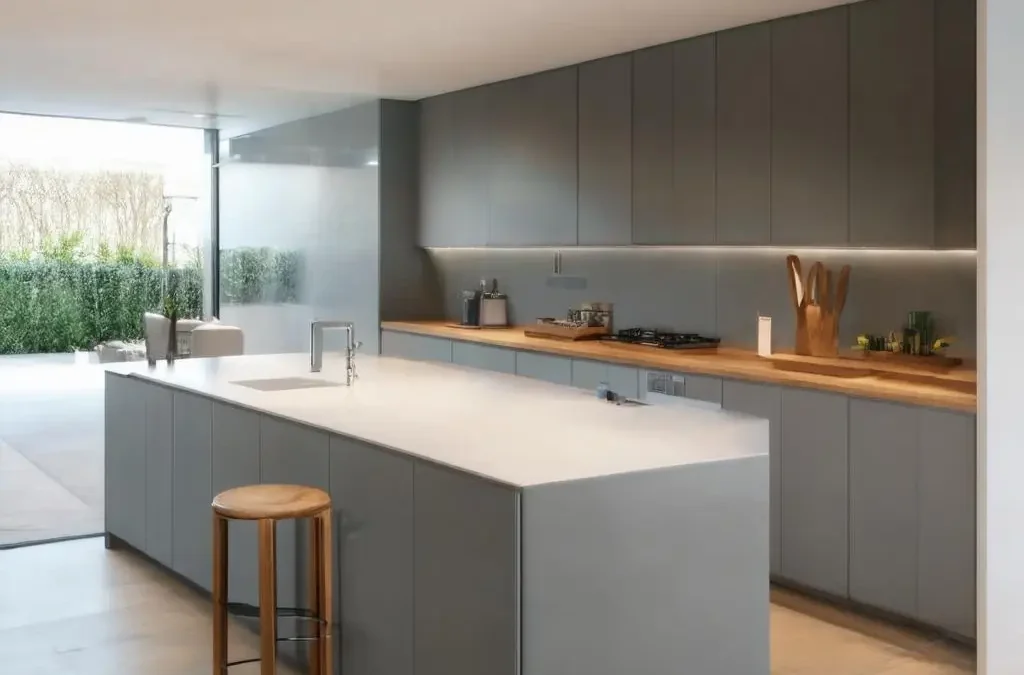
A full kitchen rip‑out is costly, disruptive, and often unnecessary. In many homes, the cabinet boxes are structurally sound; it is the doors, end panels, and tired hardware that date the space. By refacing — replacing only the visible elements — you can achieve a high‑end look at a fraction of the price and with minimal downtime.
A recent DIY full‑kitchen remodel illustrates the point. The homeowners kept their cabinet carcasses, fitted new handleless matt doors for a clean, contemporary profile, added soft‑close hinges for a premium feel, installed a simple laminate worktop, and introduced a single splurge: solid oak shelves for warmth and tactility. The result? A quiet, modern kitchen that looks and functions like new, delivered on a realistic budget.
Doorfinder specialises in this exact approach. You will find:
- High gloss doors from £10.06 for a light‑reflective, modern finish
- Handleless doors from £13.01 for sleek, minimalist lines
- Matt doors from £11.65 for a soft, design‑forward look
- Shaker doors from £21.94 for timeless character
- End panels, kitchen units, and wardrobe doors (from £14.27), plus handles, hinges, and storage solutions
With a lowest price guarantee, expert advice, and free delivery across the UK mainland, the economics are compelling. For many projects, refacing saves 30–60% compared with a full replacement, while still delivering the “wow” factor where it counts.
To maximise impact for the least money, allocate your budget as follows:
- Save on the big surfaces that are easy to refresh: doors, panels, and standard worktops.
- Splurge selectively on tactile, focal pieces you touch and see every day: a solid wood shelf, a standout bar stool, or a statement pendant over a breakfast nook. One or two considered upgrades can elevate the entire scheme.
The Save‑vs‑Splurge Playbook
Save:
- Keep sound cabinet boxes. Clean, prime edges as needed and fit new replacement doors in your preferred style — handleless, matt, high gloss, or shaker — to reset the visual language of the room.
- Upgrade to soft‑close hinges. They transform everyday use for a modest outlay and protect doors from slamming.
- Choose a simple, durable worktop. Minimalist quartz or high‑quality laminate stretches funds further than heavily veined stones, which can carry a significant premium. Opt for a square‑edge profile for a crisp look.
- Refresh panels and plinths. Matching end panels, corner posts, and plinths tie the new doors back to the carcasses for a seamless finish.
- Select streamlined handles or go handleless where the door style allows. A restrained handle choice keeps the look cohesive and contemporary.
Splurge:
- One statement timber element (e.g., solid oak shelves or a chunky chopping block) to add warmth and tactility.
- A standout breakfast bar stool or two — it is amazing how much design presence a single sculptural seat can bring.
- Task lighting that you will use for years: a high‑quality under‑cabinet LED kit or a pair of elegant pendants over a peninsula.
Your Practical Roadmap
1) Plan the layout and traffic flow
- Map the work triangle (hob, sink, fridge) and maintain clear paths. Consider sightlines from adjoining rooms. If space permits, add a compact peninsula to delineate zones and create casual seating.
- Identify opportunities for a breakfast nook or a laptop‑friendly perch. A shallow run of units with an overhanging top can double as a micro‑desk without crowding the room.
2) Measure doors, end panels, and appliance gaps carefully
- Remove one existing door to confirm hinge positions and overlay type.
- Measure height and width of every door and drawer front in millimetres; note any variations between carcasses.
- Record hinge hole positions and cup sizes if reusing holes.
- Check appliance gaps, filler widths, and end panel sizes; ensure plinth heights are consistent.
- Double‑check radii and arches on any curved or shaped doors and panels to avoid miscuts. Photograph each run and label measurements to match.
- Allow for scribing where walls are out of square.
3) Order finish kitchen door samples and test colours in real light
- Request colour and finish samples for doors, panels, and worktops. Doorfinder provides a broad range of finishes across gloss, matt, handleless, and shaker styles.
- View samples in natural daylight and under task lighting at night. Tape them vertically on doors to judge sheen and colour shift at eye level.
- Pair samples with floor and splashback options to confirm undertones.
4) Schedule upgrades in the right order
- Units and panels first: fit new or replacement carcasses where required and install end panels, corner posts, and plinths.
- Doors and hinges next: hang doors, set reveals, and adjust hinge tension; add soft‑close as standard.
- Worktop after doors: scribe and fit once carcasses are true and doors aligned to ensure clean overhangs and joints.
- Backsplash and hardware last: tile or fit splashbacks, then install handles or knobs and final accessories.
5) Practise key skills before the main event
- If you are tiling, practise on a low‑stakes area (behind a bin store or inside a utility) to perfect spacing and grout lines before tackling the principal splashback.
- Rehearse hinge installation on a spare panel to set drill depth and avoid blow‑through.
- Dry‑fit a run of doors on trestles to test handle positions and spacing before drilling.
Pro tip: Photograph each stage and label every bag of fixings. When upgrading over several evenings, this small discipline saves hours.
Functional Upgrades that Make Daily Life Easier
- Breakfast nook or compact desk/peninsula: A 300–400 mm overhang on a run of units can create a perch for coffee or email without a full island. Pair with a single statement stool for your “splurge” moment.
- Storage that works hard:
- Pull‑out baskets and pan drawers bring deep storage to you.
- Corner solutions (Le Mans trays, carousels) unlock blind corners.
- Slim pull‑outs beside the cooker store oils and spices where you need them.
- Drawer dividers keep utensils, knives, and baking tools organised.
- Hardware and hinges: Soft‑close hinges and high‑quality runners significantly improve the daily experience at low cost.
- Appliances and ventilation: If keeping existing appliances, refresh seals and filters. If upgrading, confirm new dimensions against your measured gaps before ordering.
- Finishing touches: Choose handles that echo your door style — sleek bars for handleless‑look doors, classic cup pulls for shaker — or go handle‑free where your chosen door allows. A restrained palette of two metals at most keeps the scheme coherent.
Doorfinder’s range of doors, panels, units, and accessories makes these upgrades straightforward, and expert advice is available if you need help choosing compatible hinges, runners, or storage kits. Free delivery across the UK mainland helps you keep the budget focused on the materials rather than logistics.
Budget Pointers, DIY Scope Checklist, and a Weekend Timeline
Budget pointers
- Expect refacing to save roughly 30–60% versus a full kitchen replacement, assuming your carcasses are sound.
- Soft‑close hinges deliver a premium feel for a modest spend and extend the life of your doors.
- Minimalist quartz or quality laminate typically costs far less than heavily veined or book‑matched stones. Keep edges square and lengths standard to minimise fabrication costs.
- Spend where your hands and eyes land daily: the tap, a favourite stool, or a timber shelf. Let doors and panels carry the visual refresh efficiently.
- Doorfinder’s lowest price guarantee and UK‑mainland free delivery help ensure replacement doors (high gloss from £10.06, matt from £11.65, handleless from £13.01, shaker from £21.94) and accessories stay within reach.
DIY scope checklist
Most confident DIYers can typically handle:
- Measuring, planning, and ordering doors, panels, and hardware
- Removing old doors and plinths; fitting new doors, panels, handles, and soft‑close hinges
- Installing pull‑outs, dividers, and most storage accessories
- Preparing and painting walls; fitting simple laminate worktops with the right tools and assistance
- Tiling a splashback after practising on a low‑stakes area
Strongly consider hiring a professional for:
- Electrical work (new circuits, sockets, lighting) — use a qualified electrician familiar with UK Building Regulations
- Gas connections or alterations — use a Gas Safe registered engineer
- Plumbing alterations that involve mains shut‑offs or complex waste rerouting
- Heavy worktop handling and stone fabrication — templating, cutting, and lifting require specialist skills and equipment
- Structural changes, including removing walls or altering doorways
A weekend‑friendly task timeline
- Thursday evening (prep): Finalise measurements, lay out tools, label fixings, and clear countertops. Pre‑drill a test door for handles.
- Friday evening (strip‑out): Remove old doors, handles, and plinths. Inspect carcasses, tighten fixings, and square up cabinets.
- Saturday morning (panels and plinths): Fit end panels, filler pieces, and new plinths. Scribe where walls or floors are out of true.
- Saturday afternoon (doors and hinges): Hang new doors, fit soft‑close hinges, adjust reveals, and install drawer fronts. Add temporary handle templates if needed.
- Sunday morning (worktop and sealing): Fit laminate worktop or prepare for templating if using quartz. Seal cut‑outs, refit sink and hob where appropriate.
- Sunday afternoon (splashback and hardware): Tile or fit the splashback, grout, and install handles or knobs. Rehang plinths, tidy silicone, and conduct final adjustments.
- Following evening(s): Install pull‑outs and dividers, mount open shelves, and dress with lighting. Dispose of packaging responsibly.
With a clear plan, precise measurements, and a disciplined order of works, you can refresh your kitchen quickly and affordably — achieving a high‑end look by investing where it counts and saving smartly everywhere else. Doorfinder’s broad range, expert guidance, and UK‑wide free delivery make the process simpler from sample to final hinge click.