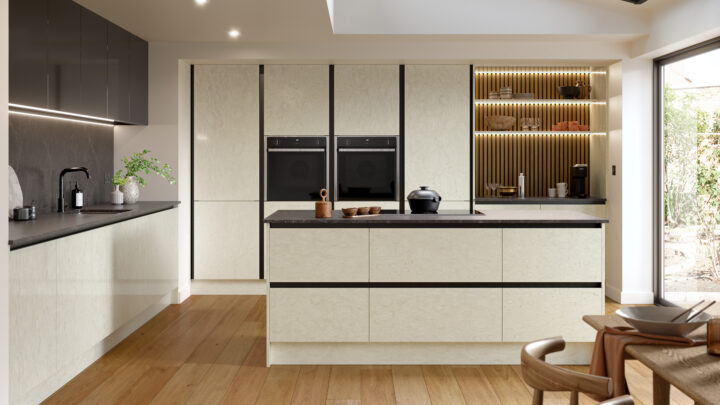
The revival of hands‑on home skills has put small, achievable projects at the heart of weekend plans. Replacing kitchen or wardrobe doors and end panels—while keeping your existing carcasses—delivers a dramatic visual upgrade for a fraction of the cost, time, and waste of a full refit. It is beginner‑friendly, requires only standard tools, and preserves sound cabinetry that would otherwise end up in landfill.
Doorfinder specialises in this exact approach. With high‑quality replacement doors, panels and accessories at unbeatable prices—high gloss doors from £10.06, handleless from £13.01, matt from £11.65, and shaker from £21.94, plus wardrobe doors from £14.27—you can refresh the look without replacing the structure. Add in a lowest price guarantee, expert advice, and free delivery across the UK mainland, and your project becomes both accessible and economical.
Planning is where you win the day. A clear plan reduces errors, keeps the budget on track, and speeds up installation.
- Measure carcasses precisely in millimetres:
- Height and width of each opening (mm), not the old door itself.
- If doors are framed by end panels or fillers, measure the visible openings and note any out‑of‑square walls.
- Record hinge details:
- Hinge cup diameter (commonly 35 mm).
- Hinge cup centre distance from the door edge and from the top and bottom.
- Hinge type: overlay (door covers the carcass side), half‑overlay (two doors share a panel), or inset (door sits within the opening).
- Count components: doors, drawer fronts, end panels, plinths, cornice/pelmet, and any fillers.
- Photograph existing layouts and label each cabinet; this is your reference during installation and when ordering.
- Check appliance fronts (integrated fridges/dishwashers) for special sizes or hinge types.
- Decide whether you want pre‑drilled doors; if not, you will need a hinge jig.
Keep a simple project folder (digital or paper) with all measurements, notes, and photos. It will act as your single source of truth when ordering from Doorfinder and during fitting.
Choosing styles, colours, and coordinating details
Your door style sets the tone of the room. Consider how you use the space, the light levels, and the surrounding finishes.
- High gloss: Ideal for compact kitchens or darker rooms; gloss bounces light to make spaces feel larger. Pair with muted matt panels or brushed metal handles for balance.
- Matt: A modern, elegant finish that is fingerprint‑resistant and low‑glare. Works beautifully with warm woods, stone‑effect worktops, and black or brass hardware.
- Shaker: Timeless and textured, shaker brings depth without fuss. Choose soft neutrals for classic schemes or bold colours for a contemporary twist.
- Handleless: Clean lines and a minimal silhouette suit open‑plan spaces. Add matching J‑profile end panels or discreet push‑to‑open fittings for a cohesive look.
Colour pairing tips:
- Use a two‑tone palette: darker base units with lighter wall units to anchor the room and lift the eye.
- Complement worktops: choose a door colour that either gently contrasts with your worktop (e.g., warm grey with pale oak) or matches a fleck in the surface.
- Consider flooring and appliances: stainless steel pairs well with cooler greys and blues; warm brass and wood suit creams, greens, and earthy tones.
- Sample first: order sample doors or swatches to view in your own lighting at different times of day.
Do not overlook the supporting cast. Coordinate matching panels, plinths, trims, and end panels to carry the finish seamlessly around corners and exposed carcass ends. Doorfinder supplies panels, kitchen units, and a wide range of accessories—handles, hinges, and storage solutions—so you can specify everything from one place and ensure a consistent colour and sheen.
Tools and materials you will need
Having the right kit makes the work faster and neater. Gather the following before you start:
- Measuring and marking: tape measure, sharp pencil, combination square, masking tape, and a scriber or compass for panels.
- Alignment: spirit level and reliable straightedge.
- Drilling and fixing: drill/driver, wood bits (including a 35 mm Forstner bit if you are drilling hinge cups), small bits for pilot holes, and a hinge jig (if doors are not pre‑drilled).
- Clamping and protection: clamps, soft pads, dust sheets, and safety glasses.
- Hardware and consumables: soft‑close hinges, handles/knobs, appropriate screws, adhesive for panels, edge tape, and soft‑close dampers for drawers/doors.
Doorfinder can supply the hardware alongside your doors, ensuring compatibility and saving time on sourcing.
Step‑by‑step: from removal to a showroom‑style finish
1) Prepare and remove
- Protect floors and worktops. Clear work surfaces.
- Remove one door at a time. Support the door, then undo the hinge screws from the carcass.
- Label each door and its location (e.g., “Sink base, left”) and keep hinges and screws together in marked bags if you plan to reuse them.
- Remove handles and plinths carefully. Photograph hinge positions and handle spacing for reference.
2) Fit hinges to new doors
- If pre‑drilled: match the hinge cups and fix the hinges to the door.
- If not pre‑drilled: mark cup centres from the door edge and top/bottom based on your plan; use a hinge jig and a 35 mm bit. Drill to the correct depth so the hinge sits flush.
- Identify hinge type (overlay, half‑overlay, inset) and choose the right mounting plates.
3) Hang and adjust
- Offer the door up and fix hinges to the carcass. Start with the top hinge.
- Use the three hinge cams for fine adjustment:
- Depth (in/out) brings the door closer to or away from the carcass.
- Side (left/right) perfects the reveal to its neighbour.
- Height (up/down) aligns top and bottom edges with adjacent doors.
- Aim for consistent, even reveals around each door and across the run.
4) Mark and drill handle holes
- Use a template or make one from card/ply to guarantee uniform spacing.
- Apply masking tape where you drill to reduce chipping; drill from the face side with a sharp bit.
- Fit handles/knobs and nip up screws; final‑tighten after all doors are aligned.
5) Scribe, cut, and fit end panels
- Measure twice and allow for out‑of‑plumb walls. Scribe the panel to the wall/floor using a scriber, then cut to the line with a fine‑tooth saw or track saw.
- Dry‑fit before fixing with adhesive and discreet screws where appropriate.
- Add edge tape to exposed edges for a matched finish.
6) Plinths, cornice, and pelmet
- Cut plinths to length and clip or screw in place level with the floor.
- Fit cornice and pelmet to wall units to complete the lines; mitre corners neatly.
7) Finish with soft‑close dampers
- Add clip‑on soft‑close dampers to hinges and drawer runners for a premium feel and quieter kitchen.
Take your time on alignment. Small adjustments deliver a visibly professional result.
Time, budget, pitfalls, wardrobes, and what to tackle yourself
Time and budget
- Most first‑time DIYers can refresh a typical 8–12‑door kitchen in a long day or over a weekend, including panel scribing and handle fitting.
- Expect a fraction of the cost of a full refit because you are retaining carcasses, worktops, plumbing, and electrics. With Doorfinder’s pricing—such as high gloss doors from £10.06 and shaker from £21.94—plus a lowest price guarantee and free UK mainland delivery, costs are predictable and controlled.
Common pitfalls to avoid
- Mixing up left/right doors. Label clearly and keep a cabinet‑by‑cabinet checklist.
- Mis‑measuring hinge positions. Always reference the carcass and record cup centre distances from edges and ends.
- Uneven handle spacing. Use a drilling template and double‑check symmetry before drilling.
- Skipping panel scribing. Walls and floors are rarely true; scribe for tight, shadow‑free joints.
- Not ordering spares. A spare handle and an extra length of plinth or trim can save a project from delays.
Wardrobes too
- The same process applies to hinged wardrobe doors. Measure the carcass openings and overall door heights in mm, note hinge type and positions, and consider soft‑close hinges for bedrooms as well.
- Tall doors benefit from an extra pair of hands and a third hinge to prevent bowing. Check ceiling heights and floor levels carefully.
- Sliding systems are different: confirm track brand and compatibility, overall opening height including wheels, and door thickness. Replacements may require matched tracks; if in doubt, seek advice.
Safety and scope
- Confident DIYers can handle doors, panels, handles, and trims. Always wear safety glasses, support large panels, and use sharp, appropriate tools.
- Leave electrics, gas, and structural changes to certified professionals. If moving appliances or altering plumbing, isolate supplies and seek qualified help as required.
Learning and support
- Build skills through local community classes, college short courses, or maker spaces; these often cover measuring, drilling, and cabinetry basics.
- Supplement with reputable online tutorials and manufacturer guides to hinge adjustment and panel scribing.
- Use a printable measuring checklist to standardise your notes. At minimum, include:
- Cabinet location and number
- Opening height and width (mm)
- Hinge cup size (usually 35 mm)
- Hinge positions from door edge and from top/bottom (mm)
- Hinge type (overlay/half‑overlay/inset)
- Quantity of doors, drawer fronts, panels, plinth lengths, and trims
- Handle/knob centre positions
- Doorfinder’s expert advisers can review your measurements, guide you on hinge choices, and help coordinate matching panels and trims. With round‑the‑clock online service from its London head office and free UK mainland delivery, support and supply are close at hand.
Sustainability: a smarter kind of renovation
- Reusing sound carcasses avoids unnecessary waste, reduces the carbon footprint of your project, and saves money. By pairing durable new doors and panels with existing units, you achieve a fresh, showroom‑style finish without discarding functional materials.
- Choosing quality hardware and adding soft‑close components extends the life of your refresh, ensuring it looks and feels excellent for years.
With careful planning, the right components, and a methodical approach, you can deliver a transformative result in a single weekend—proof that the DIY revival is practical, stylish, and kinder to both your wallet and the planet.