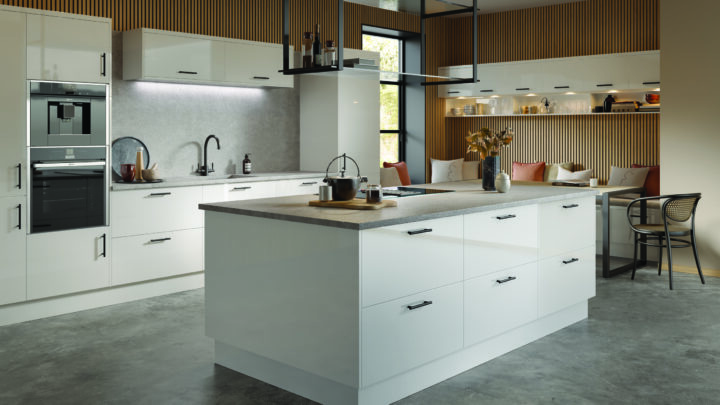
A kitchen door‑swap is the fastest, most economical way to transform a tired kitchen without ripping out sound cabinetry. By replacing only the doors and visible end panels, you keep disruption low, waste minimal and the budget under control—perfect for a weekend upgrade.
Follow this simple plan:
- Friday evening: confirm measurements, finalise your basket, and place your order with Doorfinder. With a lowest price guarantee, expert advice on hand, and free UK mainland delivery, you keep costs down and logistics stress‑free.
- Saturday: clear and protect the workspace, remove old doors, prepare carcasses, and fit any new end panels.
- Sunday: hang new doors, fit handles, make final adjustments, and tidy.
How to measure correctly:
- Measure every door individually in millimetres. Record width × height from the outside edge of the existing door (do not measure the carcass opening).
- Note the hinge side and number of hinges per door (tall doors may use three or four).
- Record hinge cup positions. Measure from the top edge of the door to the centre of each existing hinge cup, and from the hinge side to the centre of the cup (the “setback”). Most concealed hinges use a 35 mm cup; confirm before ordering.
- Check the overlay. Most UK kitchens are frameless with full‑overlay doors. If you have inset or partial overlay, note this for hinge selection.
- For end panels, measure the visible side of each unit and add a small scribe allowance (typically 5–10 mm) so panels can be trimmed to a perfect fit.
- If changing handle style or spacing, decide your centre‑to‑centre (C‑C) measurement now (common sizes are 96 mm, 128 mm, 160 mm). If reusing existing holes, measure and record the current C‑C.
Tip: Photograph each cabinet with a note of measurements and hinge positions. This makes ordering and fitting faster and reduces mistakes.
Choose Your New Look and the Right Hardware
Door styles and indicative starting prices from Doorfinder:
- High gloss kitchen doors from £10.06: Modern, light‑reflective and easy to wipe clean, ideal for brightening compact spaces.
- Matt kitchen doors from £11.65: Contemporary and refined with low glare; great for a calm, premium look.
- Handleless kitchen doors from £13.01: Sleek minimalism with integrated grips or push‑to‑open hardware; perfect for clean sightlines.
- Shaker kitchen doors kitchen doors from £21.94: Timeless framed design that complements both classic and modern interiors.
How to match hinges and plates:
- Concealed clip‑on hinges with 35 mm cups are standard on most UK kitchens. Choose the opening angle to suit use: 110° for general cabinets; 155° for wide internal drawers; 95° for corner restrictions.
- Soft‑close options provide a premium feel and protect door edges. If reusing old hinges, ensure the cup and plate are sound; otherwise replace as a complete pair for best results.
- Hinge plates come in different heights; replacing like‑for‑like typically preserves alignment. If you are unsure, Doorfinder’s expert advice can confirm compatibility from your measurements.
- Special cases: Bi‑fold or corner units may need specific hinges; integrated appliance doors require appliance‑specific fixings—check before ordering.
Selecting handles:
- Knobs are forgiving and quick to fit; bar or bow handles require accurate C‑C drilling.
- Choose a finish that complements your appliances and taps (e.g., brushed nickel, black, brass).
- Consider ergonomics on tall doors and integrated pull heights. For handleless doors, confirm whether you need push latches or profile rails; Doorfinder stocks suitable components.
Tools Checklist and Preparation
Tools and materials:
- Tape measure, sharp pencil and notepad
- Drill/driver with 2–3 mm pilot bit and screwdriver bits
- 35 mm Forstner bit (only if you are drilling hinge cups yourself)
- Handle drilling jig or template, masking tape and a bradawl/centre punch
- Spirit level, square, clamps and packers/shims
- Fine saw or scribing saw/plane for end panels
- Screws (suitable length for hinges and handles), cabinet bumpers, edge sealant/caulk
- Protective sheets, dust mask, safety glasses and gloves
Preparation:
- Clear worktops and floor, and protect with dust sheets or cardboard.
- Empty the first run of cabinets for safer access.
- Label each old door before removal (e.g., “Sink base R‑hinge”) so you can match new doors quickly.
- Inspect carcasses: check for blown chipboard, loose fixings or out‑of‑square boxes. Minor issues can be shimmed; serious damage may justify swapping a unit (see guidance below).
Fit Like a Pro: Step‑by‑Step Weekend Installation
1) Remove old doors and hardware
- Support each door, unscrew hinges from the carcass plate (or release clip‑on hinges), and set aside the fixings you plan to reuse.
- Remove handles and keep them grouped if you are reusing.
2) Fit or refresh end panels first
- Dry‑fit to check overhangs. Scribe the panel to the wall or floor as needed for a tight, professional finish.
- Fix panels from inside the carcass using appropriate screws; avoid visible fixings where possible. Run a neat bead of decorator’s caulk where panels meet walls.
3) Prepare and position hinges
- If your doors arrive ready for hinge cups, move to step 4. If not, mark hinge cup centres using your measurements and a jig; drill clean 35 mm cups to the set depth (avoid breaking through).
- Fit hinges to the doors, ensuring all cups align and sit flush. Install hinge plates to the carcass, matching the original plate position or your layout plan.
4) Hang and align doors
- Offer the door to the cabinet and clip hinges onto the plates. Start with the top hinge, then the lower.
- Set consistent gaps (2–3 mm) between doors and along the cabinet top/bottom. Use shims or the hinge’s 3‑way adjustment screws to tweak:
- In/out to bring the door flush with the cabinet side.
- Left/right to align reveals between adjacent doors.
- Up/down to match heights across a run.
- For tall or heavy doors, add a third hinge mid‑span to prevent sag.
5) Fit handles or knobs
- Mark handle holes using a jig to maintain consistency. Apply masking tape where you drill to reduce chipping, and pilot drill before using the final bit.
- Check alignment by temporarily fitting one screw per handle; when satisfied, secure fully.
6) Finishing touches
- Stick soft bumpers to the inside corners to cushion closing and reduce noise.
- Clean the doors with a soft cloth. Remove any protective films after all drilling is complete.
- Re‑fit plinths and adjust feet if you disturbed any levels.
Time‑saving tip: Work in logical runs (e.g., base units on one wall), completing hang and alignment before moving on. This keeps reveals consistent.
Budget, Pitfalls to Avoid, and When to Add Panels or Swap a Unit
Sample budget for a typical 10–12‑door kitchen (illustrative):
- Doors (choose one style):
- High gloss: 12 × £10.06 = £120.72
- Matt: 12 × £11.65 = £139.80
- Handleless: 12 × £13.01 = £156.12
- Shaker: 12 × £21.94 = £263.28
- Hinges: 12 doors × 2 hinges each = 24 hinges (soft‑close) £40–£90 depending on specification
- Handles/knobs: 12 pieces £24–£90 depending on style and finish
- Fixings, bumpers, sealant and sundries: £10–£25
- Optional end panels (e.g., 2 visible ends): £60–£150 total depending on size and finish
- Delivery: £0 (free UK mainland delivery with Doorfinder)
Indicative totals:
- Budget high‑gloss refresh (no panels): from approximately £195–£335
- Premium Shaker with two end panels: from approximately £397–£618
Prices shown for doors are Doorfinder “from” prices; accessories and panels vary by finish and size. The lowest price guarantee and expert advice help you refine the specification to your budget.
Common mistakes to avoid:
- Guessing sizes: Always measure every door and hinge position; do not assume symmetry.
- Ordering the wrong hinge type: Confirm overlay vs inset and opening angle needs.
- Skipping end panels where sides are visible: Carcass sides rarely match new doors; add panels for a cohesive look.
- Misaligned handle drilling: Use a jig and double‑check C‑C spacing before drilling.
- Over‑tightening screws: This can strip threads in chipboard and deform hinge cups—snug, not brutal.
- Ignoring reveals: Aim for consistent 2–3 mm gaps for a professional finish.
- Forgetting appliances: Integrated dishwasher and fridge/freezer doors need specific brackets and clearances—verify before ordering.
When to add panels or swap a unit:
- Add end panels if:
- A cabinet side is visible at the end of a run or around an island/peninsula.
- You want to hide damage, previous fixings, or mismatched finishes.
- You are changing to a thicker door profile and want a balanced look at the gable.
- Consider swapping a unit if:
- The carcass is swollen, blown or crumbling (often from water ingress near sinks or dishwashers).
- The base has sagged, screws no longer hold, or the box is out of square and cannot be shimmed.
- Hinges have torn out repeatedly, indicating compromised substrate.
- You need a layout improvement (e.g., converting a cupboard to pan drawers for better storage).
Why choose Doorfinder for a stress‑free weekend project:
- Lowest price guarantee keeps your spend lean without compromising quality.
- Expert advice helps you confirm measurements, hinge compatibility and finish selection before you buy.
- 24/7 online service means you can plan, compare and order at any hour that suits you.
- Free UK mainland delivery saves time and money, so everything arrives ready for your weekend.
With accurate measurements, the right hardware and a clear plan, swapping doors—not units—delivers a striking transformation in just two days. Choose your finish from high gloss, matt, handleless or Shaker, order with confidence from Doorfinder, and enjoy a refreshed kitchen that looks new for a fraction of the cost.