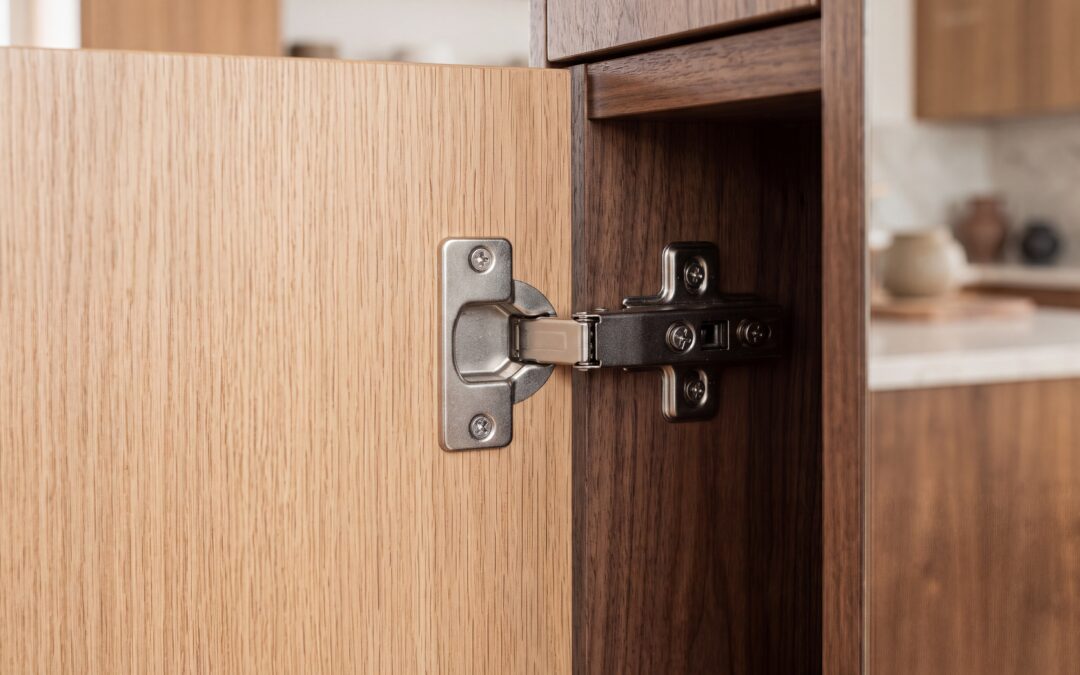
There is nothing quite as annoying as a cabinet or wardrobe door that catches on the frame, scrapes against the unit below, or refuses to shut flush. Drooping cabinet doors do not just look untidy; over time, the friction from misalignment can damage your door fronts and cabinet carcasses. The good news is that fixing a sagging door is usually a straightforward DIY job that takes less than ten minutes with nothing more than a standard cross-head screwdriver.
Step 1: Diagnose Why the Door Is Sagging
Before grabbing your toolkit, open the offending door and take a close look at the hinges. Most modern kitchen and wardrobe doors hang on concealed European hinges, which offer three directions of adjustment. Usually, sagging happens for one of three reasons:
- Loose mounting screws: The screws holding the hinge plate to the cabinet wall have worked loose over time.
- Misaligned adjustment screws: Daily use has shifted the door sideways or vertically out of true alignment.
- Stripped screw holes: The screws have pulled away from the MDF or chipboard carcass.
Step 2: Adjusting Concealed Cabinet Hinges
If the hinges are securely attached to the cabinet wall, the fix usually lies in tweaking the hinge adjustment screws. Quality cabinet hinges feature built-in mechanism screws designed specifically to fine-tune alignment:
- Vertical adjustment (Up/Down): Slightly loosen the top and bottom screws on the mounting plate attached to the cabinet carcass. Slide the door up or down until it lines up perfectly with neighbouring doors, then retighten firmly.
- Horizontal adjustment (Side to Side): Turn the frontmost screw on the hinge arm. Turning clockwise pulls the corner of the door closer to the cabinet side, while turning anti-clockwise pushes it away. Adjusting the top or bottom hinge individually will correct the tilt of a sagging door.
- Depth adjustment (In/Out): Turn the rear screw on the hinge arm to move the door closer to or further away from the cabinet frame, preventing binding against adjacent panels.
Step 3: Repairing Stripped Screw Holes
If a mounting screw spins endlessly without tightening, the wood inside the carcass wall has stripped. You can easily restore the grip without replacing the cabinet box:
Remove the screw and hinge plate. Insert a wooden matchstick or small dowel dipped in wood glue into the damaged hole. Trim it flush with the cabinet surface, allow it to dry, and then drive the screw back in. The fresh wood gives the screw a solid anchor point to bite into securely.
Step 4: Know When to Replace or Upgrade
If your hinges are bent, rusted, or loose beyond repair, fitting fresh soft-close hardware will immediately restore smooth operation. For top-hanging wall cabinets that drop unexpectedly, fitting modern lift mechanisms and struts provides reliable overhead support.
However, if the doors themselves are warped or worn out, minor hinge adjustments will only go so far. Rather than taking on the expense of a complete refit, you can simply swap the doors while keeping your existing cabinets. Upgrading to sleek handleless kitchen doors or fresh bedroom fronts offers a high-impact, budget-friendly transformation that ensures your doors hang perfectly straight for years to come.
By spending a few minutes adjusting your hinges today, you can eliminate irritating scrapes, protect your furniture, and keep your home looking neat and well-maintained.